
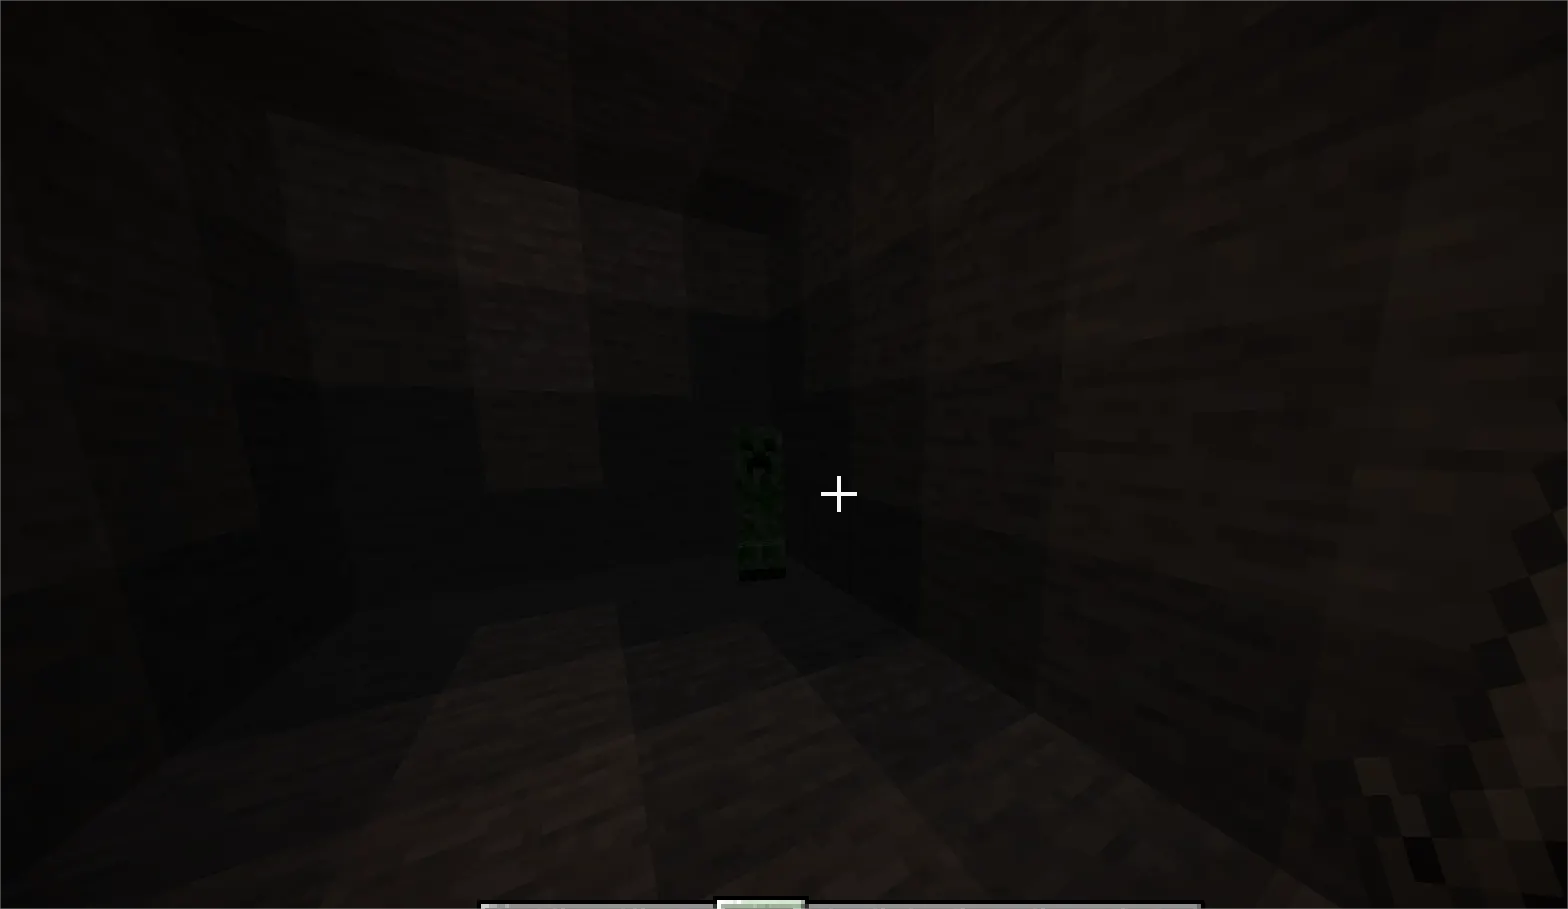
You log back in after a long session, only to find a creeper crater where your storage room used to be. Sound familiar? A properly built Minecraft mob-proof base doesn't just look good — it keeps every hostile mob out, whether you're online or offline.
This guide covers everything: lighting mechanics, sealing entry points, spider-proofing, perimeter design, passive defenses, and the best blocks to use. Whether you're on day three of a fresh world or reinforcing a base you've had for months, this is the complete breakdown.
What Is a Mob-Proof Base in Minecraft?
A mob-proof base in Minecraft is a structure that is fully protected against Hostile mob spawning and mob entry. It achieves this through two things: eliminating all dark areas where mobs can spawn (light level 0), and physically blocking every route mobs could use to enter — doors, gaps, walls, and even the roof.
A truly mob-proof base means no zombie sounds in the middle of the night, no creepers waiting at your door, and no skeletons spawning in your basement.
How to Stop Mob Spawning in Minecraft (Quick Answer)
Looking for a fast answer? Here's the core of how to mob-proof a base in Minecraft:
-
Raise all interior light levels above 0 using torches, lanterns, or glowstone
-
Seal every 1-block gap along your walls, floor, and ceiling
-
Use iron doors on Hard difficulty to prevent zombie break-ins
-
Add a 1-block overhang at the top of your perimeter wall to block spiders
-
Place top-half slabs on flat roofs to prevent Mob spawning on the surface
-
Deploy cats or iron golems for active perimeter defense
That's the foundation. The sections below explain each of these in full detail.
Lighting Mechanics: The Most Important Step
Why Light Level 0 Is the Real Enemy
Hostile mobs — zombies, skeletons, creepers, spiders — spawn on solid blocks where the light level is 0. Not dim. Not low. Exactly zero. That means a single unlit corner inside your base is enough for a mob to appear out of thin air at night.
As of Java Edition 1.18 and Bedrock Edition, the spawning threshold was tightened: mobs only spawn at light level 0, not at light level 7 or below, as it was in older versions. This actually makes full lighting slightly easier, but the rule still applies — every block matters.
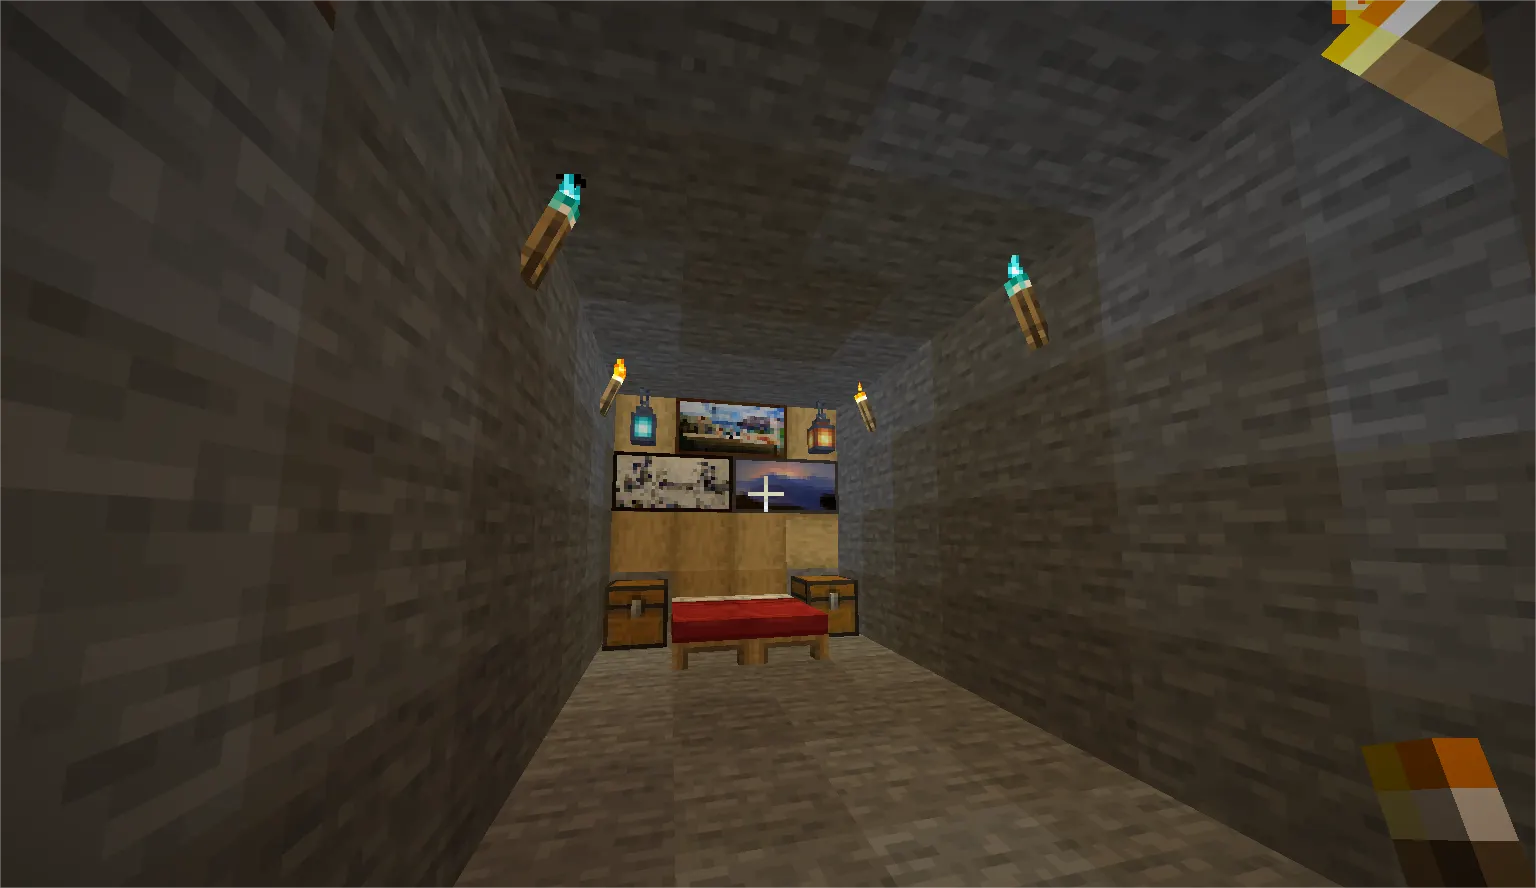
How to Light Your Base Properly
-
Torches emit light level 14 and drop by 1 per block. Place them every 6–8 blocks to ensure no gaps fall to 0.
-
Lanterns emit light level 15, making them slightly better for wider coverage.
-
Glowstone and shroomlights are ideal for decorative builds where you want lighting that doesn't break the aesthetic.
-
Don't just light the center of a room. Light the corners and edges first — those are always the first spots to drop below the threshold.
How to Check Light Levels
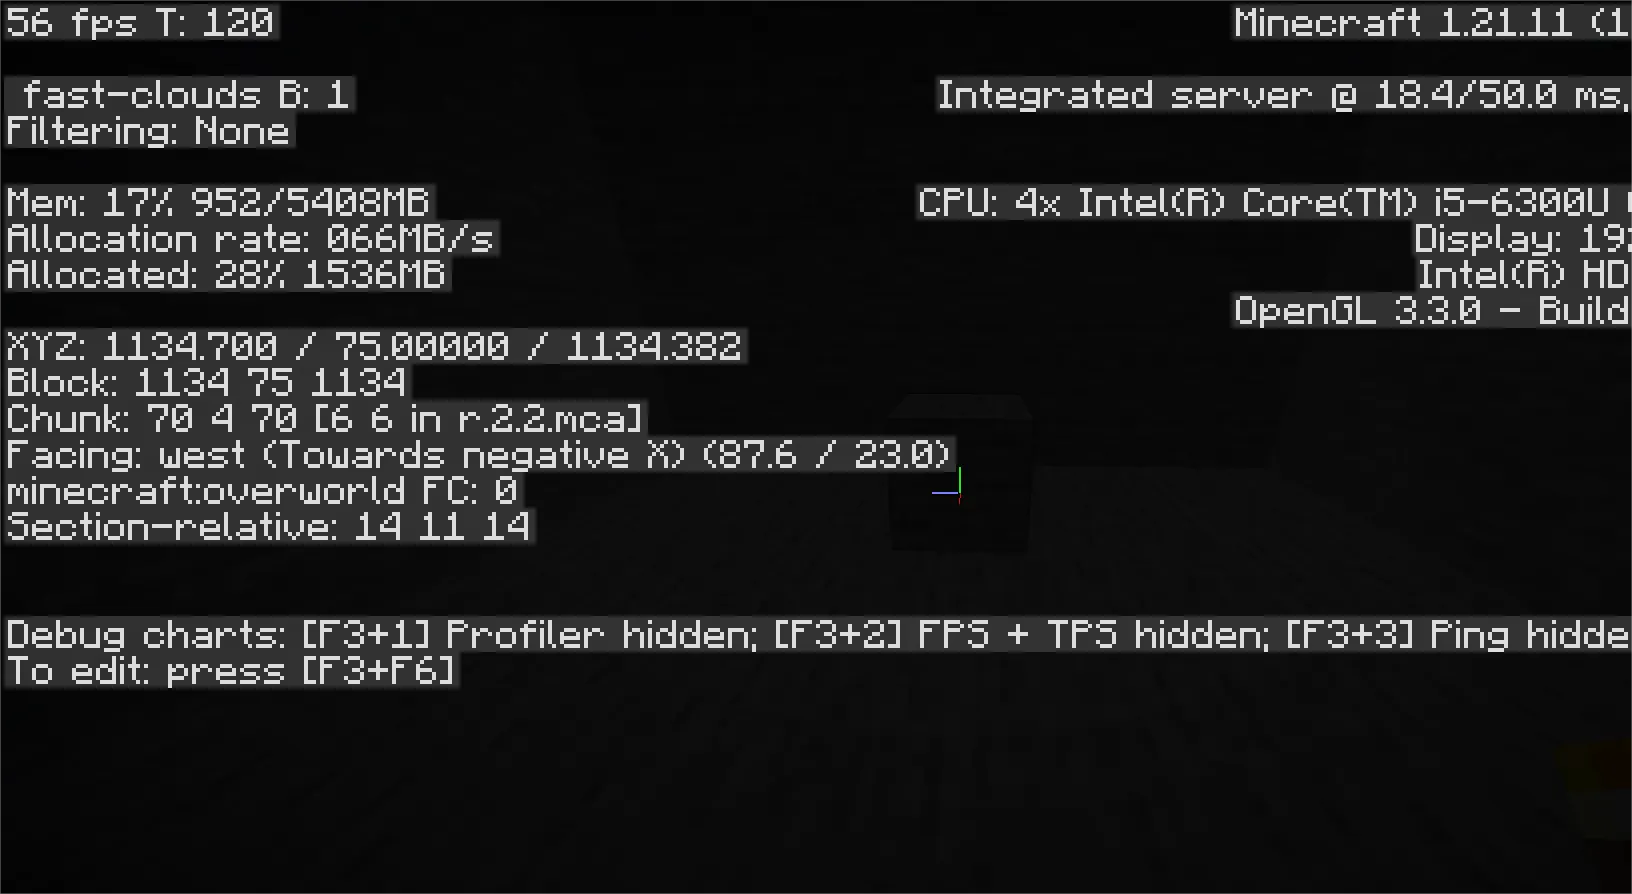
On Java Edition, press F3 and hover over any block. The "Client Light" value tells you the exact level. Anything above 0 is safe.
On Bedrock Edition, there's no built-in overlay. Drink a night vision potion and walk your base in the dark — any area that still looks dim is a problem. Fix it.
Don't forget to light: stairwells, basements, storage rooms, enclosed corridors, and any space behind furniture or walls. These spots are almost always where mobs "mysteriously" appear inside a base.
How to Seal Entry Points on Your Base
Doors
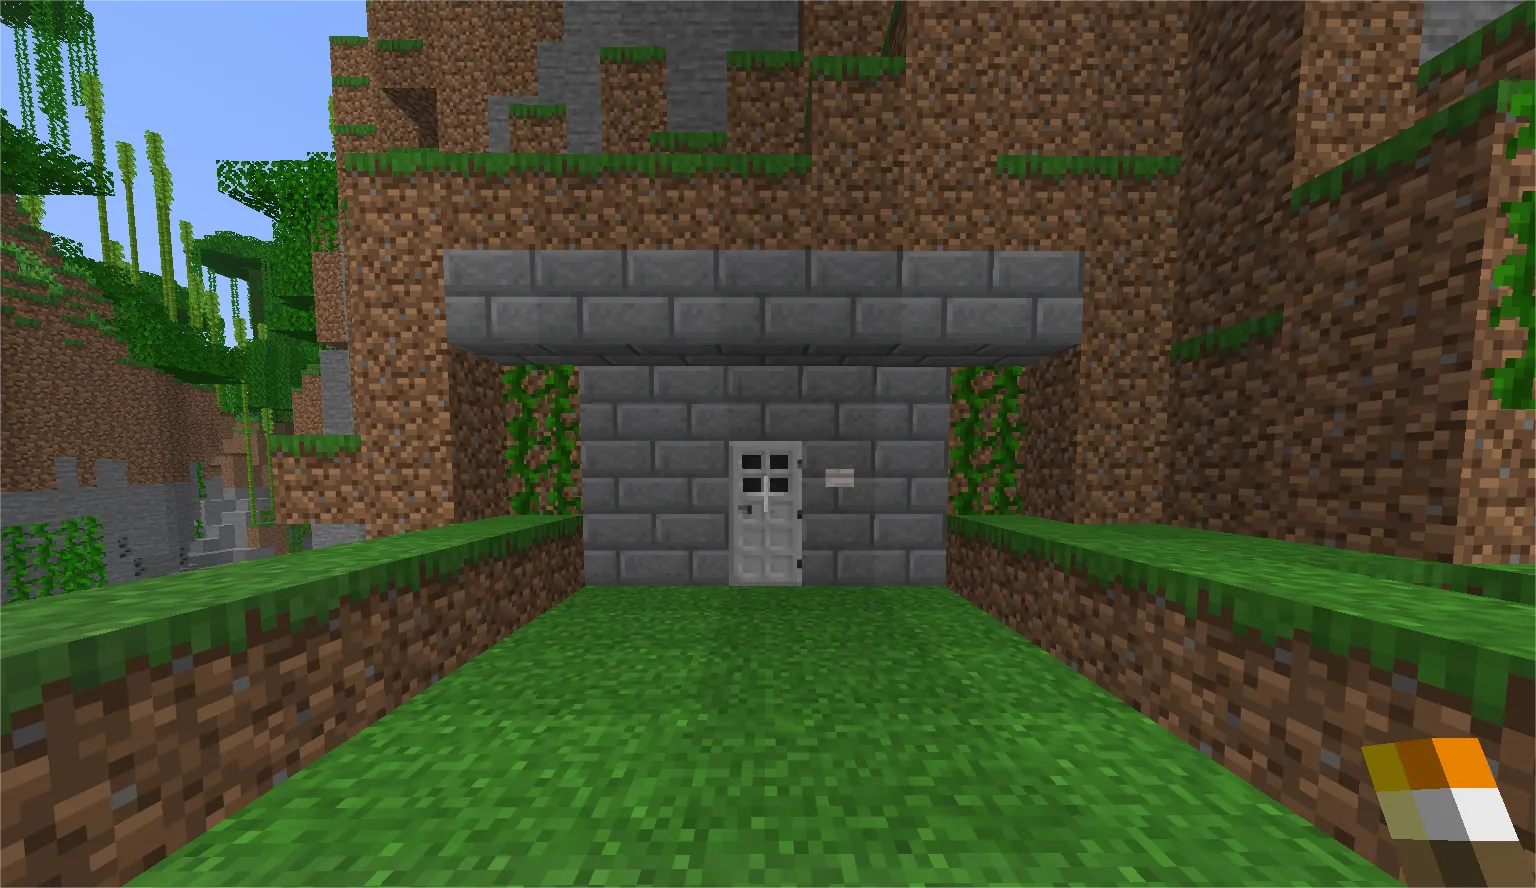
On Normal difficulty and below, wooden doors are fine. On Hard difficulty, zombies will break down wooden doors. Swap them out for iron doors with a button or stone pressure plate to open from the inside.
Use a stone pressure plate (not wooden) on the outside if you need external access. Stone pressure plates only activate for players — mobs won't trigger them.
Gaps and Wall Holes
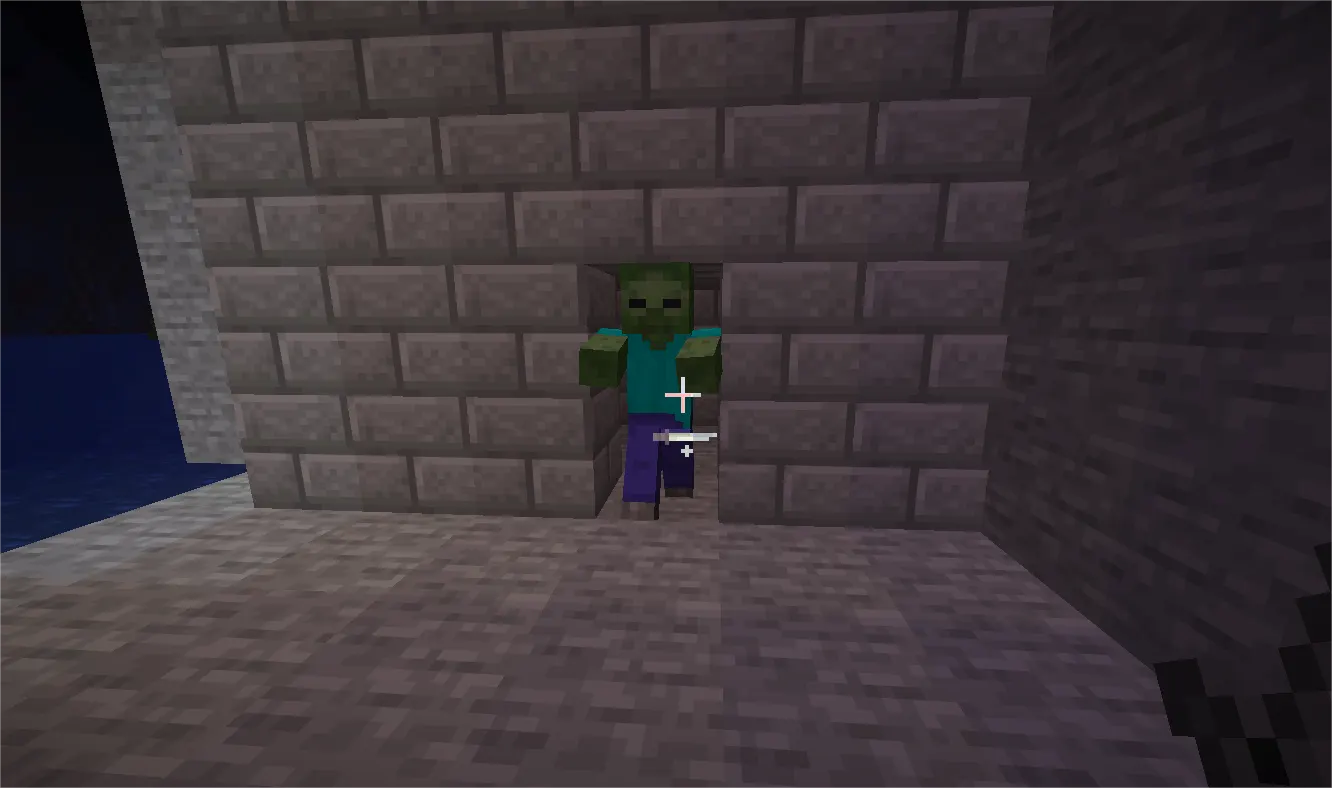
Walk your entire perimeter at ground level and look for:
-
Uneven spots where the terrain meets your wall
-
Corners that weren't fully closed
-
Any 1-block opening left for "convenience" or accidentally during building
A single full-block gap is all most mobs need. Fill everything flush with the ground. Mobs don't squeeze — they pathfind through any open block space.
Windows
Glass blocks and glass panes are both safe. Just make sure the panes connect properly at the edges — an improperly placed pane can leave a 1-block gap that mobs walk straight through.
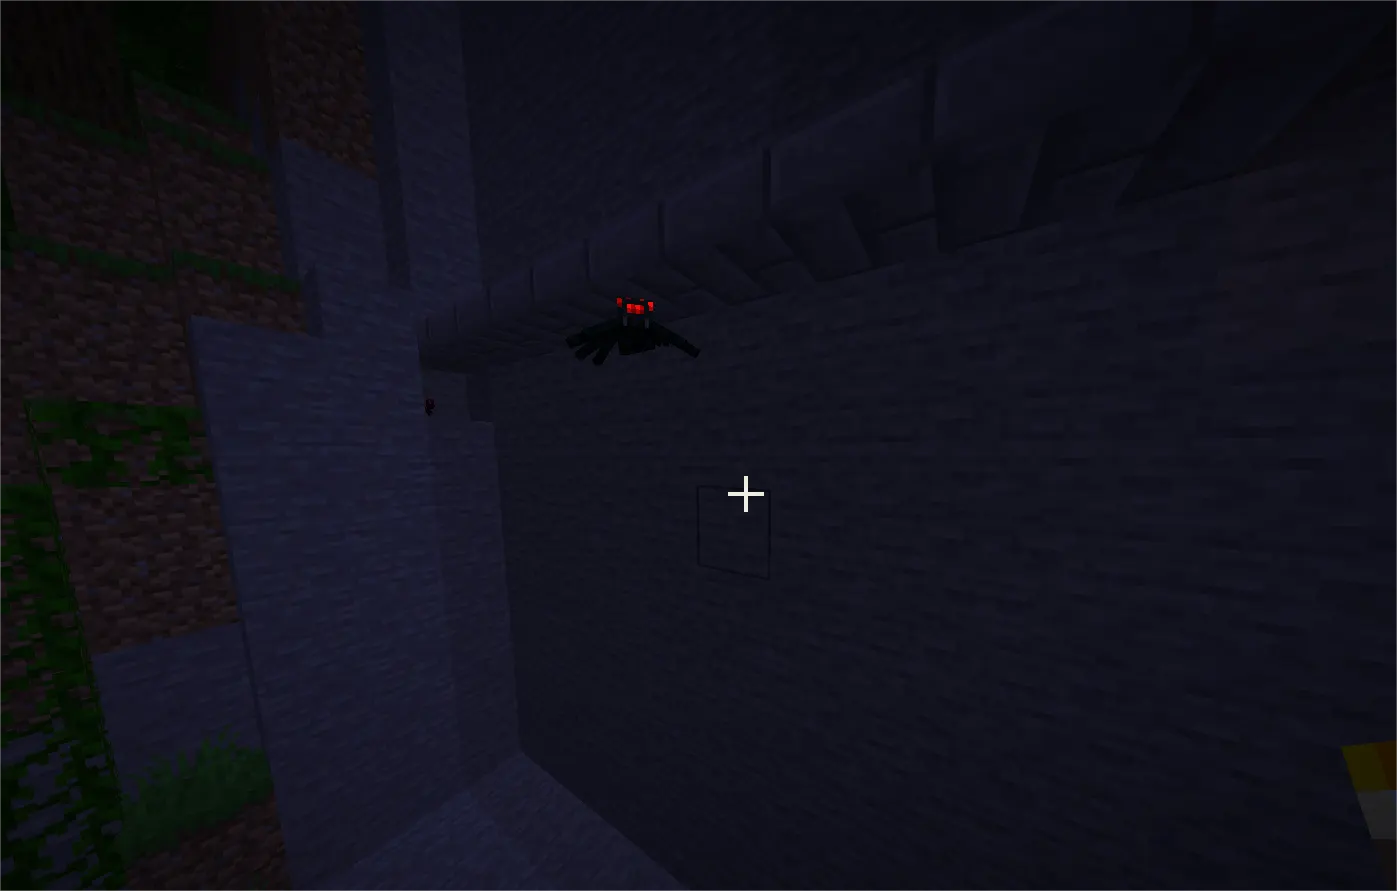
Spider-Proofing Your Base
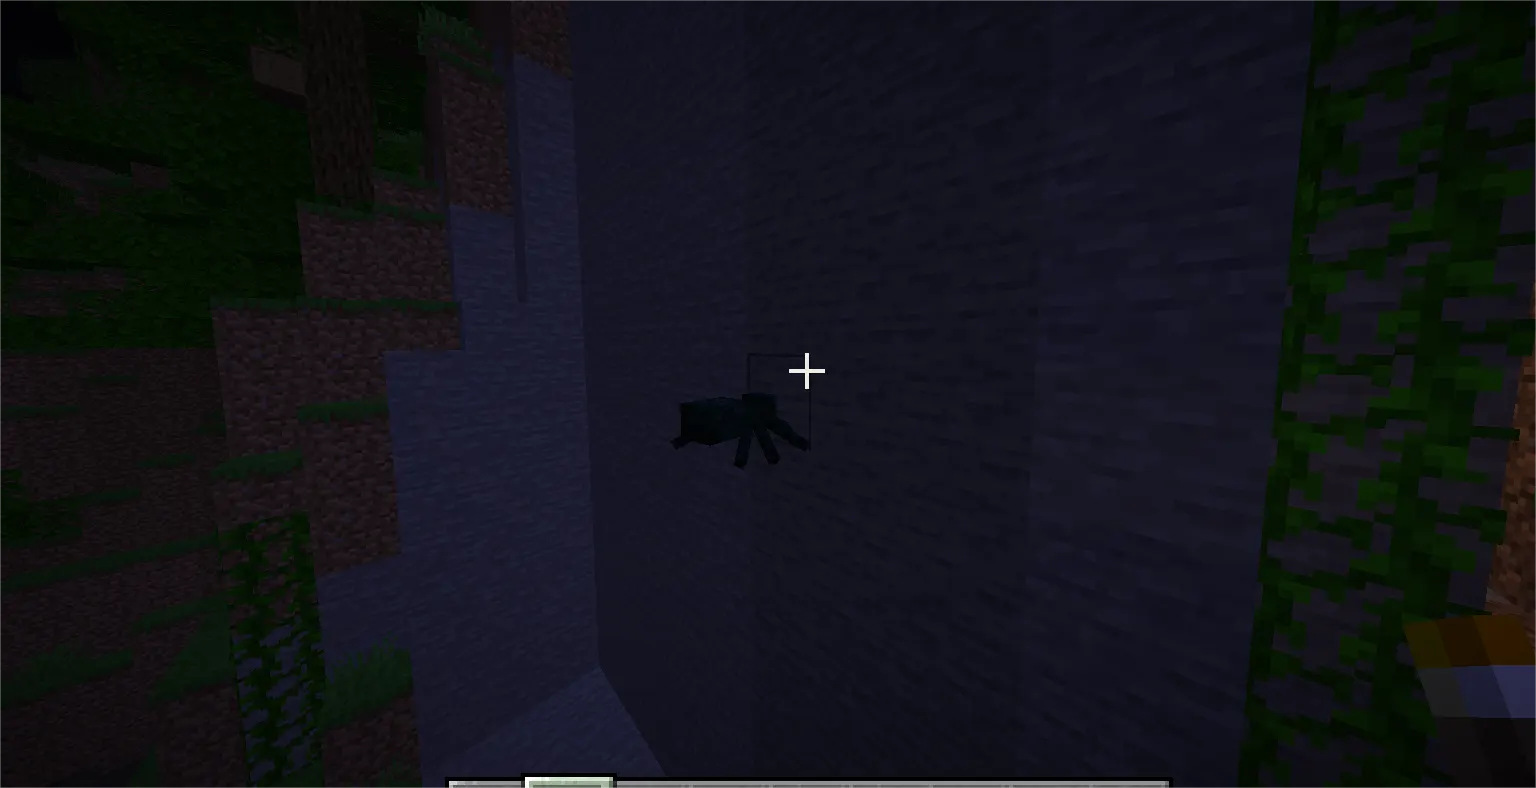
Spiders break almost every standard mob-proofing rule. They climb vertical walls, fit through 2-block-wide gaps, and won't be stopped by any wall, no matter how tall.
The Overhang Fix
The solution is a horizontal overhang at the top of your wall. Extend a row of blocks outward by 1 block all the way around your perimeter. Spiders cannot climb past an inverted surface — they'll reach the top of the wall and stop.
This is the most efficient solution, and it costs almost nothing in materials.
Full Roof Alternative
If you're building a fully enclosed compound with a solid roof, spiders are a non-issue entirely. A roof that connects to all your walls removes any surface for spiders to climb onto in the first place.
Building a Secure Perimeter for Minecraft Base Protection
Lighting the inside of your base is the 1st priority. But if creepers and skeletons are spawning right outside your front door every night, you'll always be fighting problems the moment you step out.
Wall Height and Design
-
Build your perimeter wall at least 3 blocks tall. Zombies and skeletons can jump 1 block. A 3-block wall with an overhang stops all ground-level mobs.
-
Fence + fence gate combos work well for visibility and resource efficiency. A solid wall offers stronger protection and no visual gaps.
-
Add the overhang at the top for spider defense, as covered above.
Lighting Outside the Wall
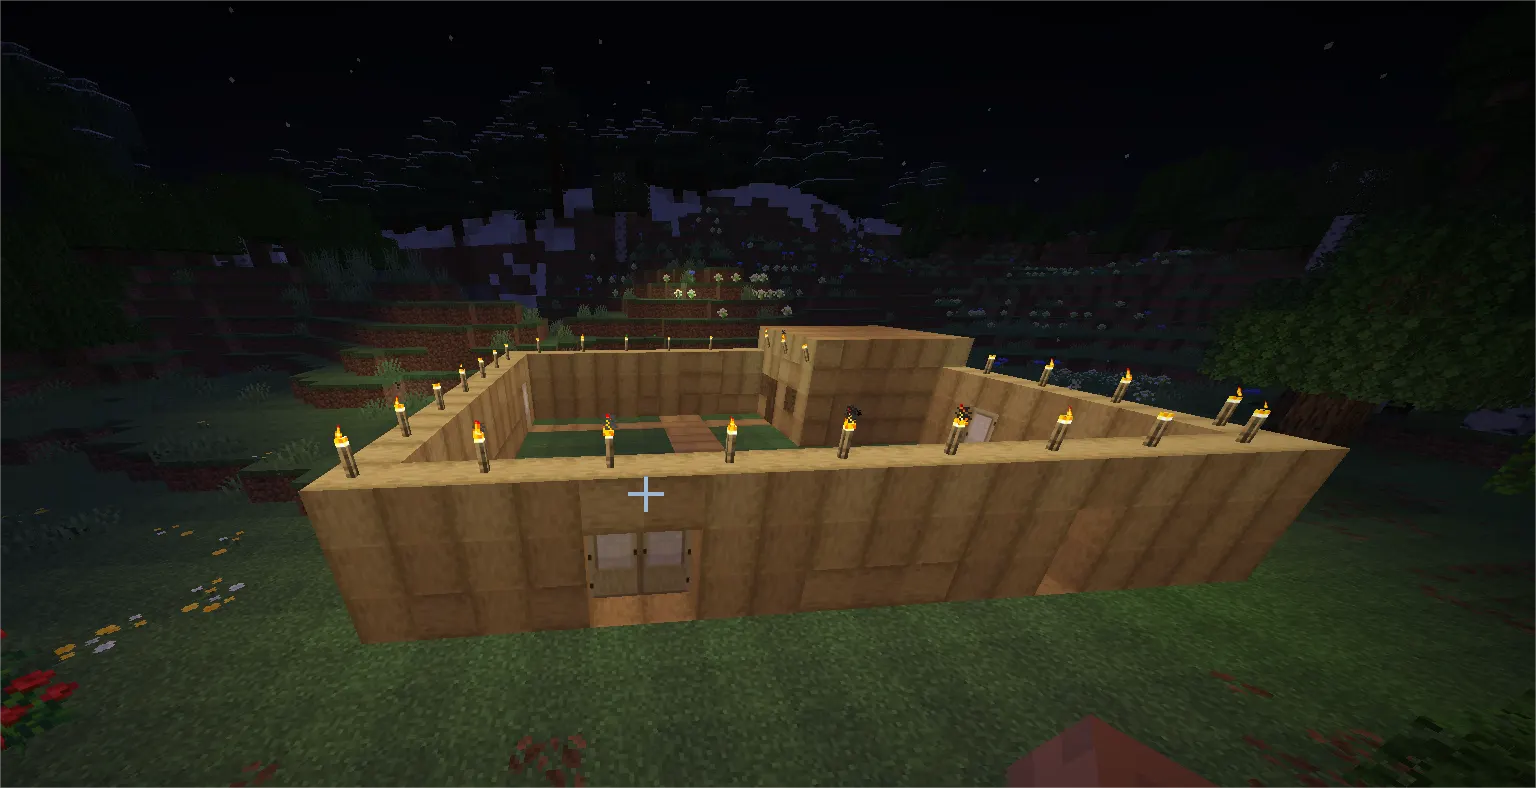
This is the step most players skip. If the area outside your wall is dark, mobs spawn just beyond it and pile up at the gates. Light both sides of your perimeter wall.
A practical trick: place torches on top of your wall every 8 blocks. This lights both the inside ledge and the ground outside at the same time, solving two problems with one row of torches.
Passive Defense: Cats and Iron Golems
Once your base is structurally mob-proof, you can add an active layer on top of it with passive defenders.
Cats
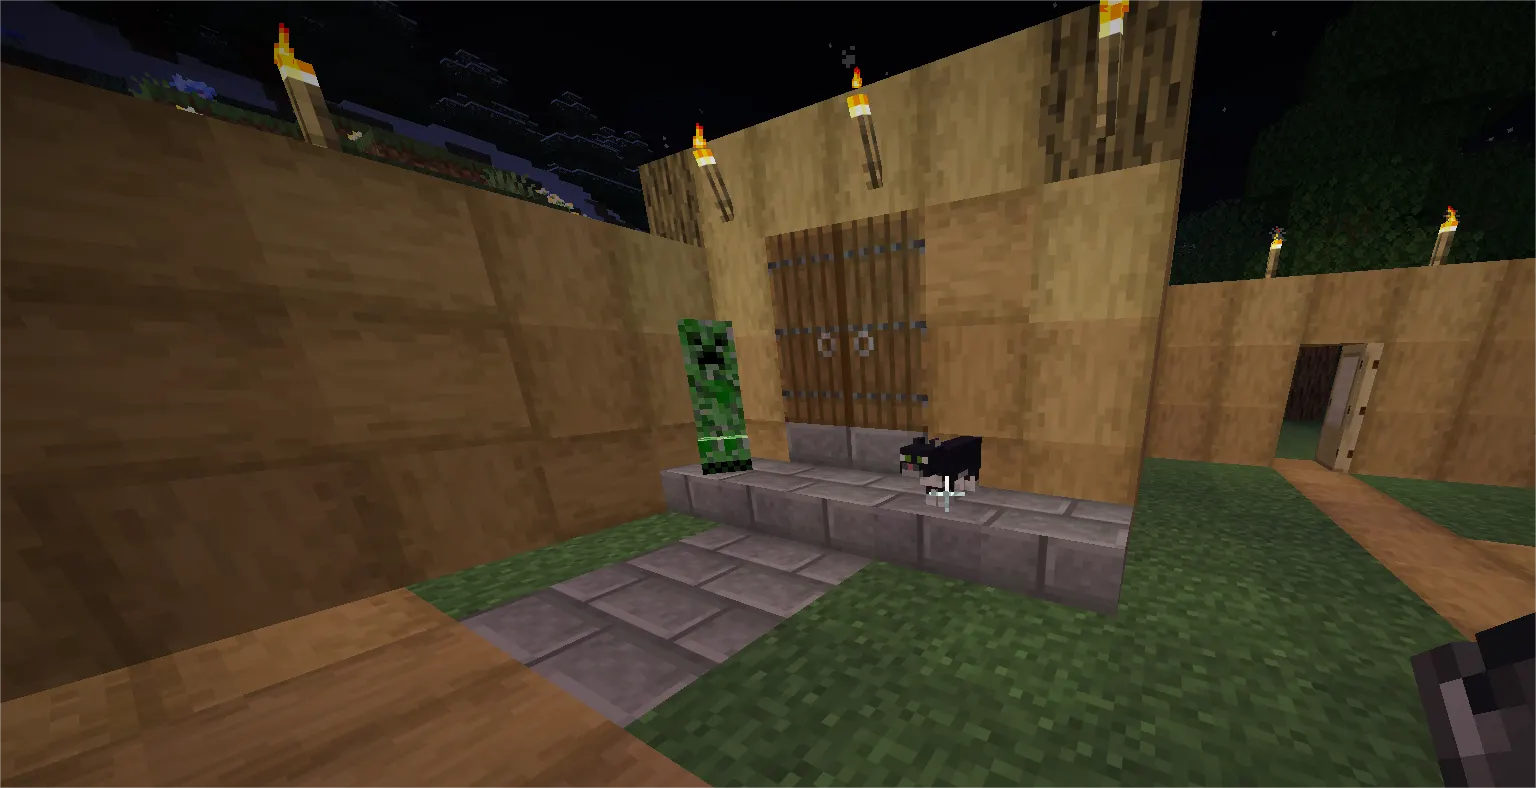
Creepers are afraid of cats. Any creeper that spawns near a cat will actively flee before detonating. Keeping two or three cats near your base entrance or outside your perimeter wall significantly reduces creeper pressure without any ongoing effort. Cats wander but stay near the player's home Bed, making them a low-maintenance option.
Iron Golems
An iron golem patrols a 16-block radius and attacks most hostile mobs on sight. They deal high damage and significant knockback, and they don't require feeding or upkeep. Place one or two near your main entrance or along the perimeter for active patrol coverage.
One thing to watch: iron golems can knock mobs into walls or toward you during combat. Placement near open areas works better than tight corridors.
Snow Golems
Snow golems only slow mobs — they don't kill them. They also melt in warm Biomes and die in rain. Use them as a distraction tool at best, not as a real base defense.
Best Blocks to Prevent Mob Spawning
Not all blocks are equal when it comes to stopping mob spawning in Minecraft. Here's what to know:
-
Top-half slabs — Mobs cannot spawn on slabs placed in the upper half of a block. Covering a large flat roof with top-half slabs eliminates spawning on that surface without placing a single torch.
-
Bottom-half slabs (default placement) — Mobs can spawn on these. Don't rely on slab floors to prevent interior spawning.
-
Glass and transparent blocks — Mobs cannot spawn on fully transparent blocks like glass. Useful for decorative floors or skylight covers.
-
Leaves — Mobs cannot spawn on leaf blocks. Niche use case, but worth knowing.
-
Gravel and sand — These spawn mobs just like any solid block. Don't leave them unlit in dark enclosed spaces.
For large outdoor courtyards or flat compound roofs, top-half slabs are the most efficient mob-proofing block in the game.
Roof and Vertical Threat Protection
Most players secure the ground floor and completely forget the top of their base. This is one of the most common reasons mobs appear "inside" a well-lit base.
Roof Spawning
Any flat, dark roof is a valid spawn surface. Mobs that spawn on your roof will eventually fall or path their way down to you. Light your roof the same way you light your floors, or cover it with top-half slabs.
Open Skylights and Wells
Mobs can fall into open pits, wells, or skylights from above if the area overhead isn't lit. Either cover these openings with slabs or glass, or make sure the space above them is fully lit.
Phantoms
Phantoms don't enter bases, but they will dive-bomb you every time you step outside without sleeping. They ignore walls entirely. The fix is simple: sleep every in-game night. If you're not sleeping regularly (speedrunning, Hardcore), keep a cat near your base entrance — phantoms are also scared of cats.
Common Mob-Proofing Mistakes
Leaving one dark corner. It only takes one block at light level 0 for a mob to spawn. Audit every room — especially stairwells and basements.
Not lighting outside the perimeter wall. Mobs spawn in the dark just outside your wall and funnel toward your entrance. Light extends beyond your walls.
Using wooden doors on Hard difficulty. Zombies will break them. Switch to iron doors.
Placing regular slabs on the floor and assuming it blocks spawns. Bottom-half slabs don't prevent spawning. Top-half slabs do.
Building a tall wall but skipping the overhang. Spiders will climb any wall without one. One block of overhang fixes this entirely.
Ignoring the roof entirely. Flat, dark rooftops are spawn surfaces. Always include them in your lighting pass.
Complete Mob-Proof Base Checklist
Before logging off, run through this:
-
Interior lighting — Every room is above light level 0, including corners
-
Basement and stairwells — Lit and verified, not just the main floor
-
Wall perimeter — No gaps, no uneven terrain openings, everything sealed flush
-
Doors — Iron doors on Hard difficulty, stone pressure plates for external access
-
Spider overhang — 1-block horizontal lip at the top of your perimeter wall
-
Exterior lighting — Torches outside your wall, not just inside
-
Roof — Lit or covered with top-half slabs
-
Passive defense — Cats near the entrance, iron golem patrol if resources allow
Conclusion
A solid Minecraft mob-proof base isn't built in one step — it's the result of understanding how mob spawning works and designing against it intentionally. Light every dark corner, seal every gap, account for spiders with an overhang, and don't forget the roof.
The more bases you build with this framework in mind, the faster it becomes second nature. You'll stop placing torches as an afterthought and start integrating them into the build from the first block. That shift in thinking is what separates a base that survives the night from one that doesn't.