Introduction
You just spawned into a new Minecraft world. Trees everywhere. The sun is slowly moving across the sky. And absolutely no idea what to do next.
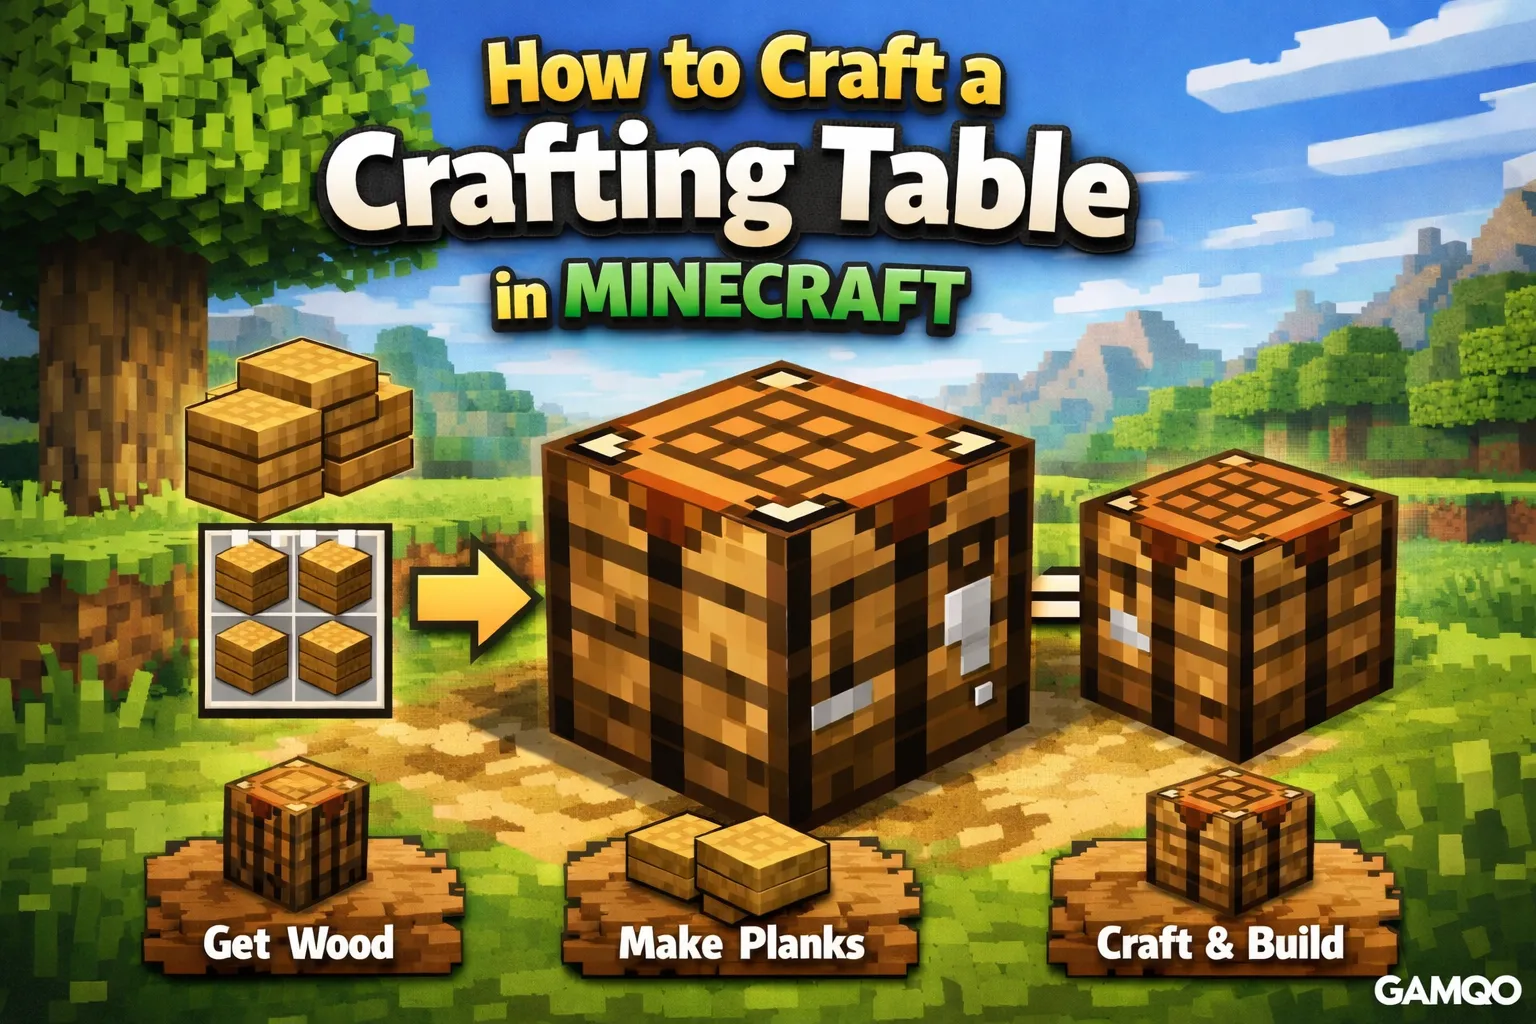
Here's the thing: the very first real task in almost every Minecraft survival run is learning how to craft a crafting table in Minecraft. It sounds almost too simple to matter. But this one wooden block is the gateway to every tool, weapon, piece of armor, and structure you'll ever build in the game.
Without it, you're stuck in the Stone Age — literally. Your bare hands can only do so much. With a crafting table placed in your world, the entire crafting system opens up, and your survival journey actually begins.
This guide covers everything: where to get the materials, exactly how to make the crafting table, how to use it properly, and what you should be building the moment it's down. Whether you're playing on Java Edition or Bedrock, this is the only guide you need.
Quick Answer
To craft a crafting table in Minecraft, punch a tree to collect one wood log, then open your inventory and convert that log into 4 wooden planks. Place all 4 planks in the 2x2 crafting grid in your inventory — one in each slot — and the crafting table will appear as the output. Drag it to your inventory, then place it in the world to access the full 3x3 crafting grid.
What Is a Crafting Table in Minecraft?
A crafting table — sometimes called a workbench — is a block that expands your available crafting space from a 2x2 grid to a full 3x3 grid.
When you first open your inventory, you'll notice a small crafting area in the top right corner. It's a 2x2 grid that only lets you make the most basic items: planks from logs, sticks from planks, and a couple of other simple recipes. That's it. You can't make a single tool, torch, or Furnace with just that grid.
A crafting table changes everything. The moment you open one, you get a 3x3 grid with 9 available slots, not 4. That's what unlocks the full Minecraft crafting table recipe library — from wooden pickaxes to bows to bookshelves.
The Difference Between 2x2 and 3x3
Think of the 2x2 inventory grid as a starter kit. It gets you off the ground, but barely. The 3x3 crafting grid is the real workshop. Almost every item you'll need to survive beyond day one requires the 3x3 layout.
|
Crafting Grid |
Where It Is |
What You Can Make |
|
2x2 |
Your inventory |
Planks, sticks, crafting table, torches (basic) |
|
3x3 |
Crafting table only |
Tools, furnace, chest, bow, armor, and hundreds more |
This distinction matters more than most beginners realize. If you're ever stuck wondering why a recipe isn't working, the answer is almost always: you need to use a crafting table, not just your inventory grid.
Why It Matters for Progression
In survival mode, crafting progression follows a chain. No crafting table means no pickaxe. No pickaxe means no stone. No stone means no furnace. No furnace means no smelting ore. No smelted ore means no iron tools.
Every major survival milestone traces back to having a crafting table first. It's the single most important block you'll make in your first five minutes of gameplay.
Materials Required
The crafting table recipe in Minecraft requires only one thing:
4 wooden planks
That's it. No stone, no iron, nothing complicated. You need wood.
The good news is that any wood type works. Minecraft has several wood varieties, and the planks from each one are interchangeable in this recipe:
-
Oak — found in plains, forests, and most common biomes
-
Birch — pale wood, very common in birch Forest Biomes
-
Spruce — darker planks, found in taiga and snowy areas
-
Jungle — found in jungle biomes, rare but usable
-
Acacia — reddish-brown, found in Savanna biomes
-
Dark Oak — very dark planks, found in dark oak forests
-
Mangrove — reddish tone, found near swamp areas
-
Cherry — pink-tinted, found in cherry grove biomes
-
Bamboo — yellow-tinted, crafted from bamboo blocks
-
Crimson / Warped — Nether wood, available once you reach the Nether
You only need one log to get started. One log converts into 4 planks, and 4 planks are exactly what the crafting table recipe needs. It's designed to be your very first crafting project.
Step-by-Step: How to Craft a Crafting Table in Minecraft
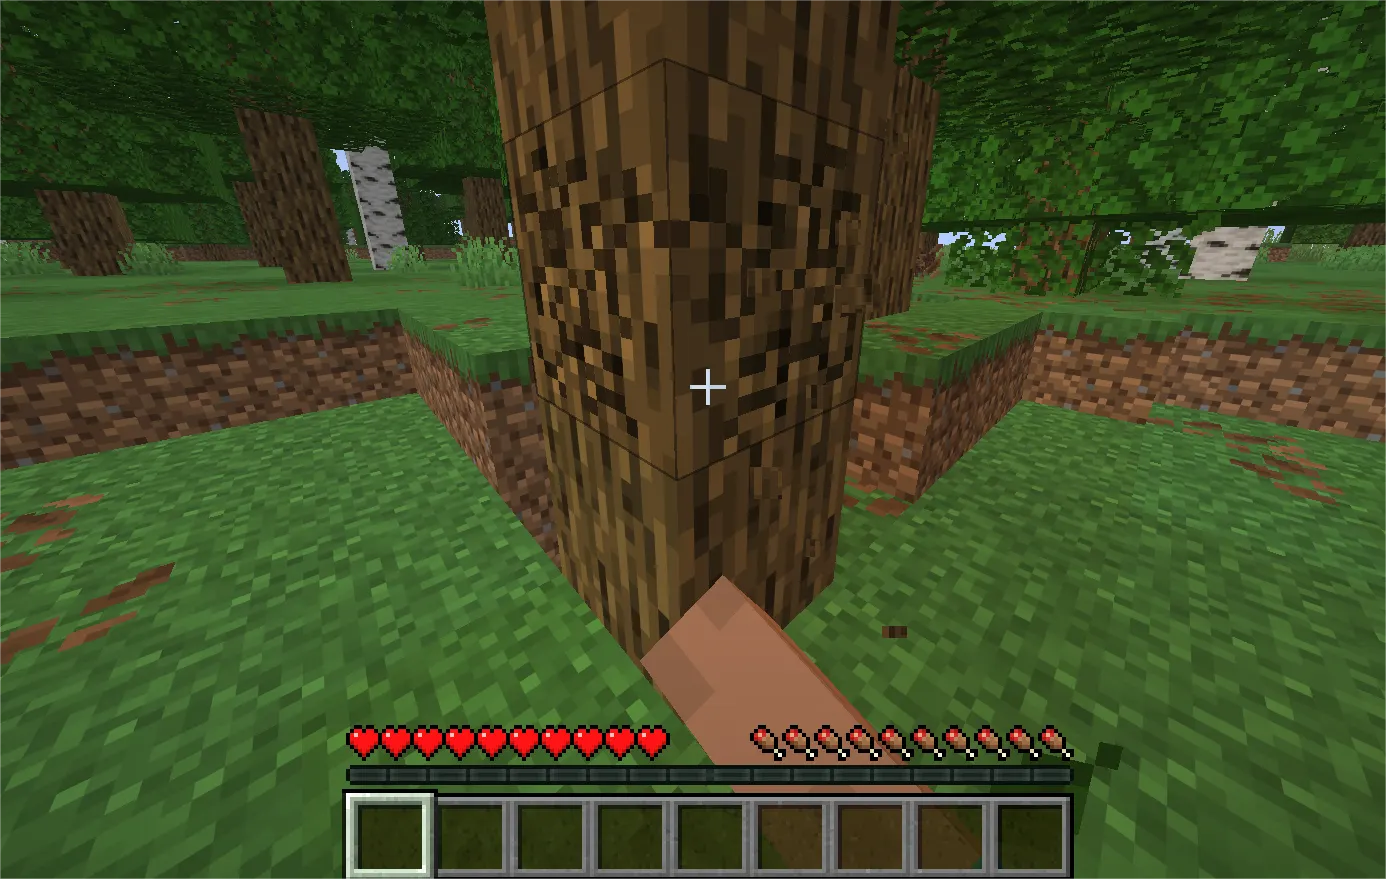
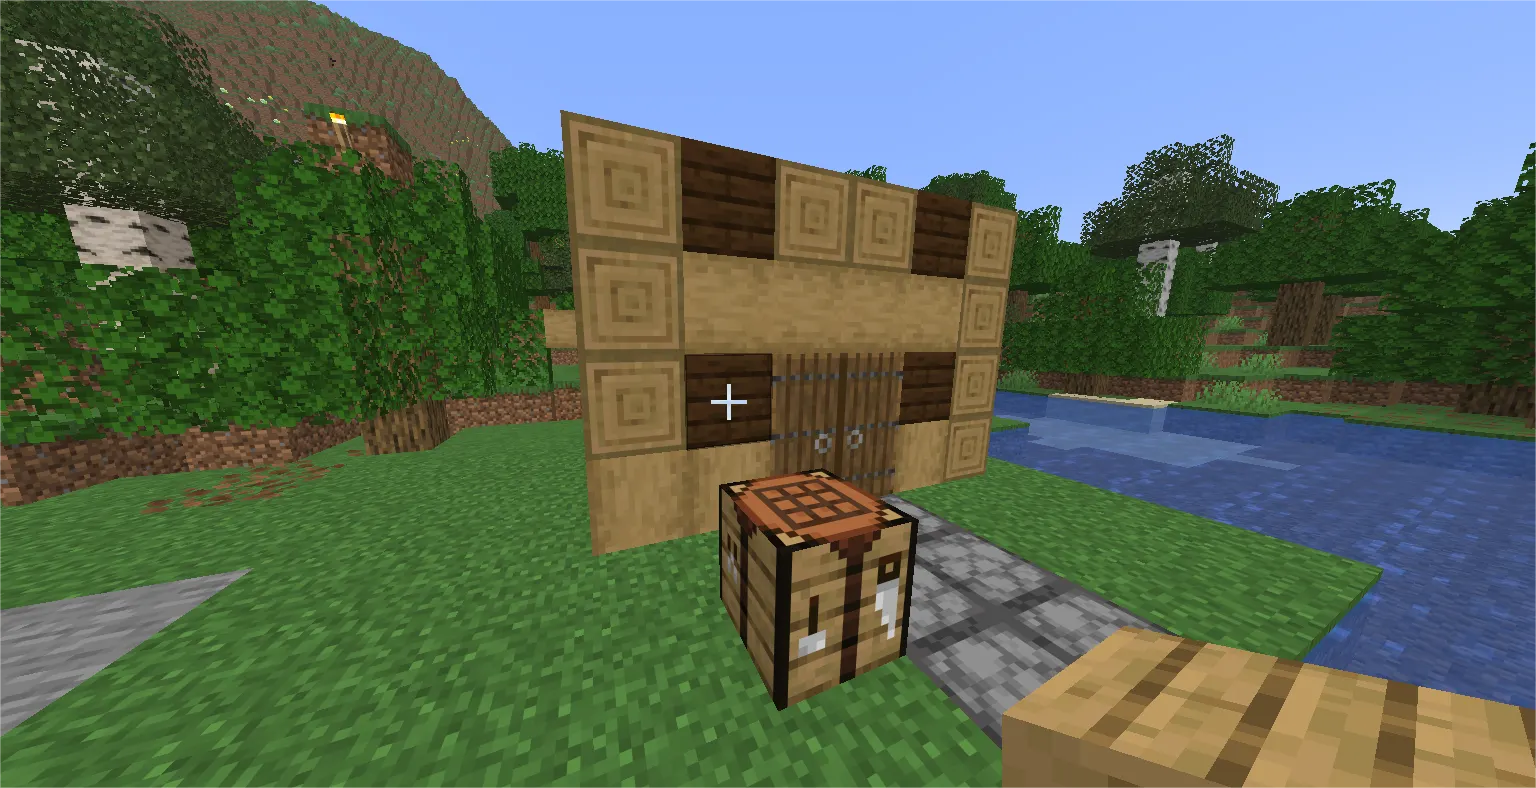
Step 1: Find a Tree and Collect Wood
Look for any tree near your spawn point. Oak trees are the most common and easiest to spot — they have a thick trunk and a round, leafy top.
Walk up to the trunk and hold down your attack button. On PC, that's left-click. On console, it's the right trigger. On mobile, tap and hold on the block. The wood block will crack and eventually break, dropping a log on the ground.
Walk over the dropped log to automatically pick it up. You'll see it appear in your hotbar or inventory.
Beginner tip: You only need 1 log to make a crafting table, but collect 4 or 5 while you're here. Wood is the foundation of everything in early survival, and having extra means you can immediately start building tools without backtracking.
Beginner tip: Don't worry about the leaves disappearing. When a tree loses most of its leaves, the leaves will slowly decay on their own. They sometimes drop saplings and apples, which are both useful.
Step 2: Convert Your Log Into Wooden Planks
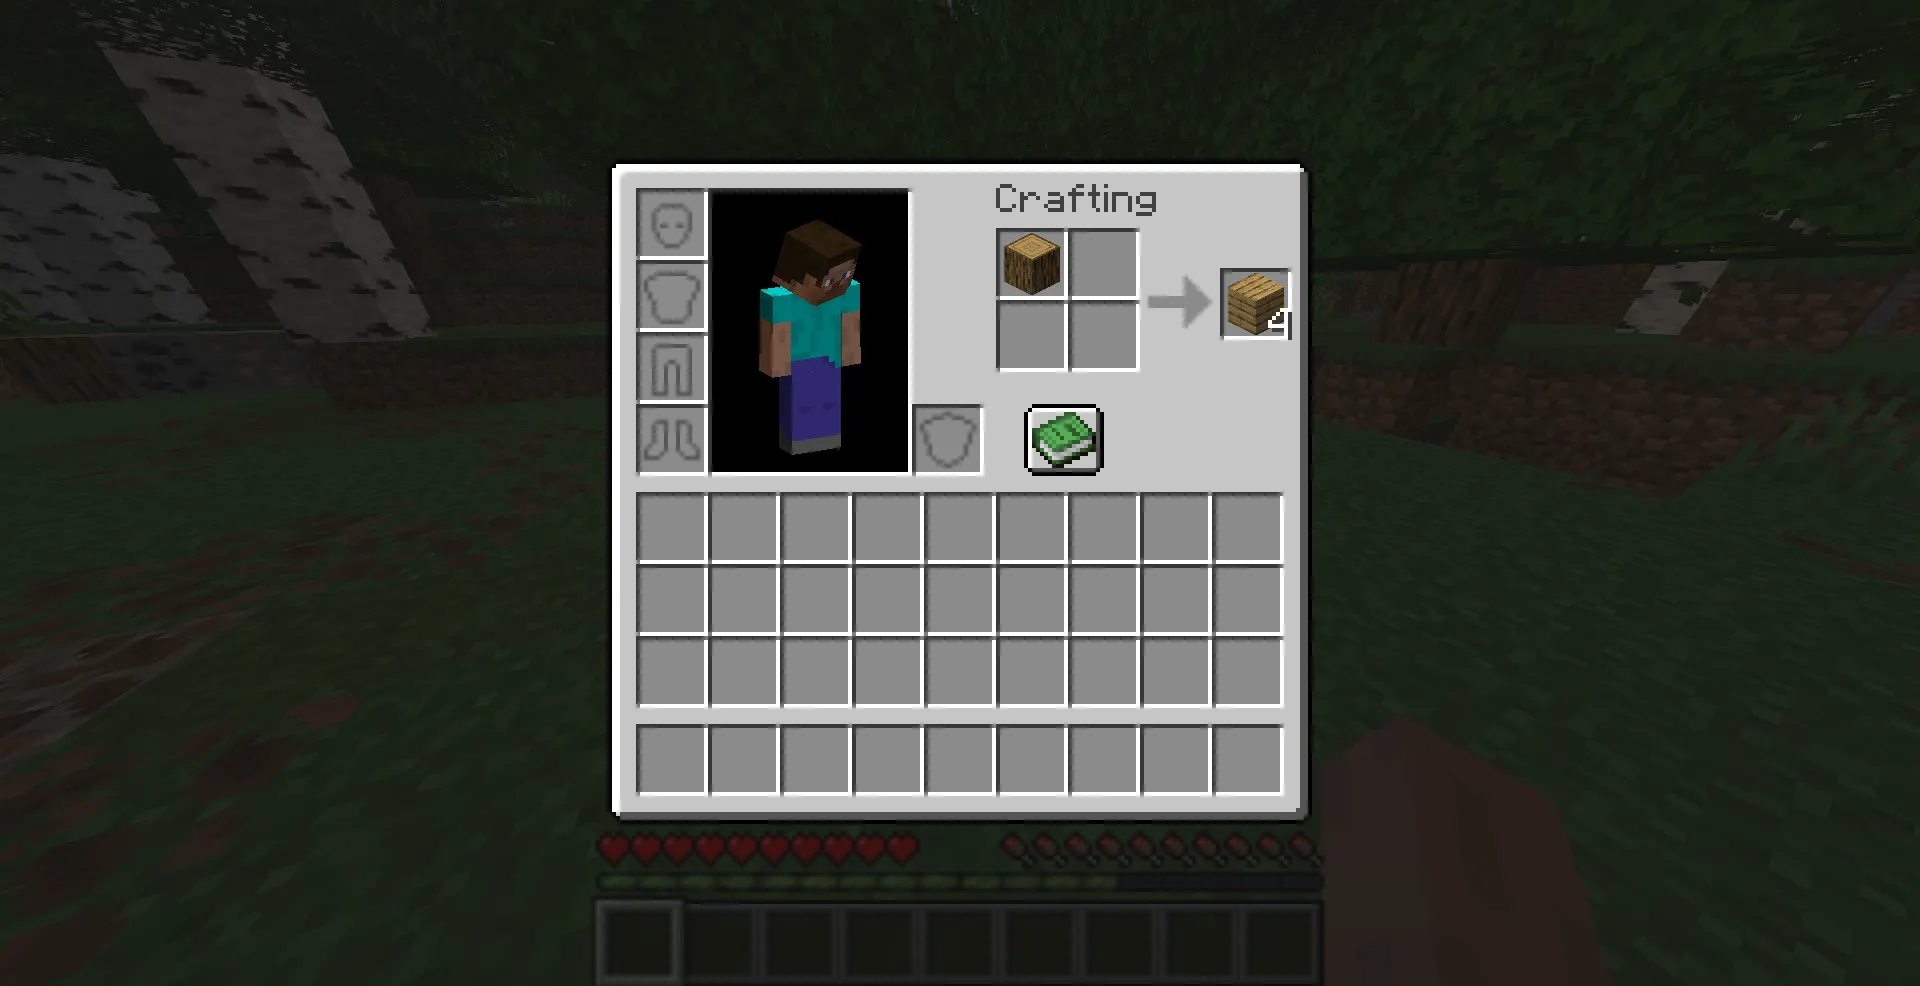
Press E on PC (or the inventory button on your platform) to open your inventory screen.
You'll see the 2x2 crafting grid in the top right of your inventory. Place your wood log into any single slot in that grid. As soon as you do, 4 wooden planks will appear in the output slot to the right.
Click or drag the planks into your inventory to collect them.
This step is where many beginners get confused. The key thing to understand is that you're using the inventory crafting grid here — not a crafting table. You don't need a crafting table to make planks. The inventory 2x2 grid handles this first conversion.
One log always yields exactly 4 wooden planks. You'll need all 4 for the next step.
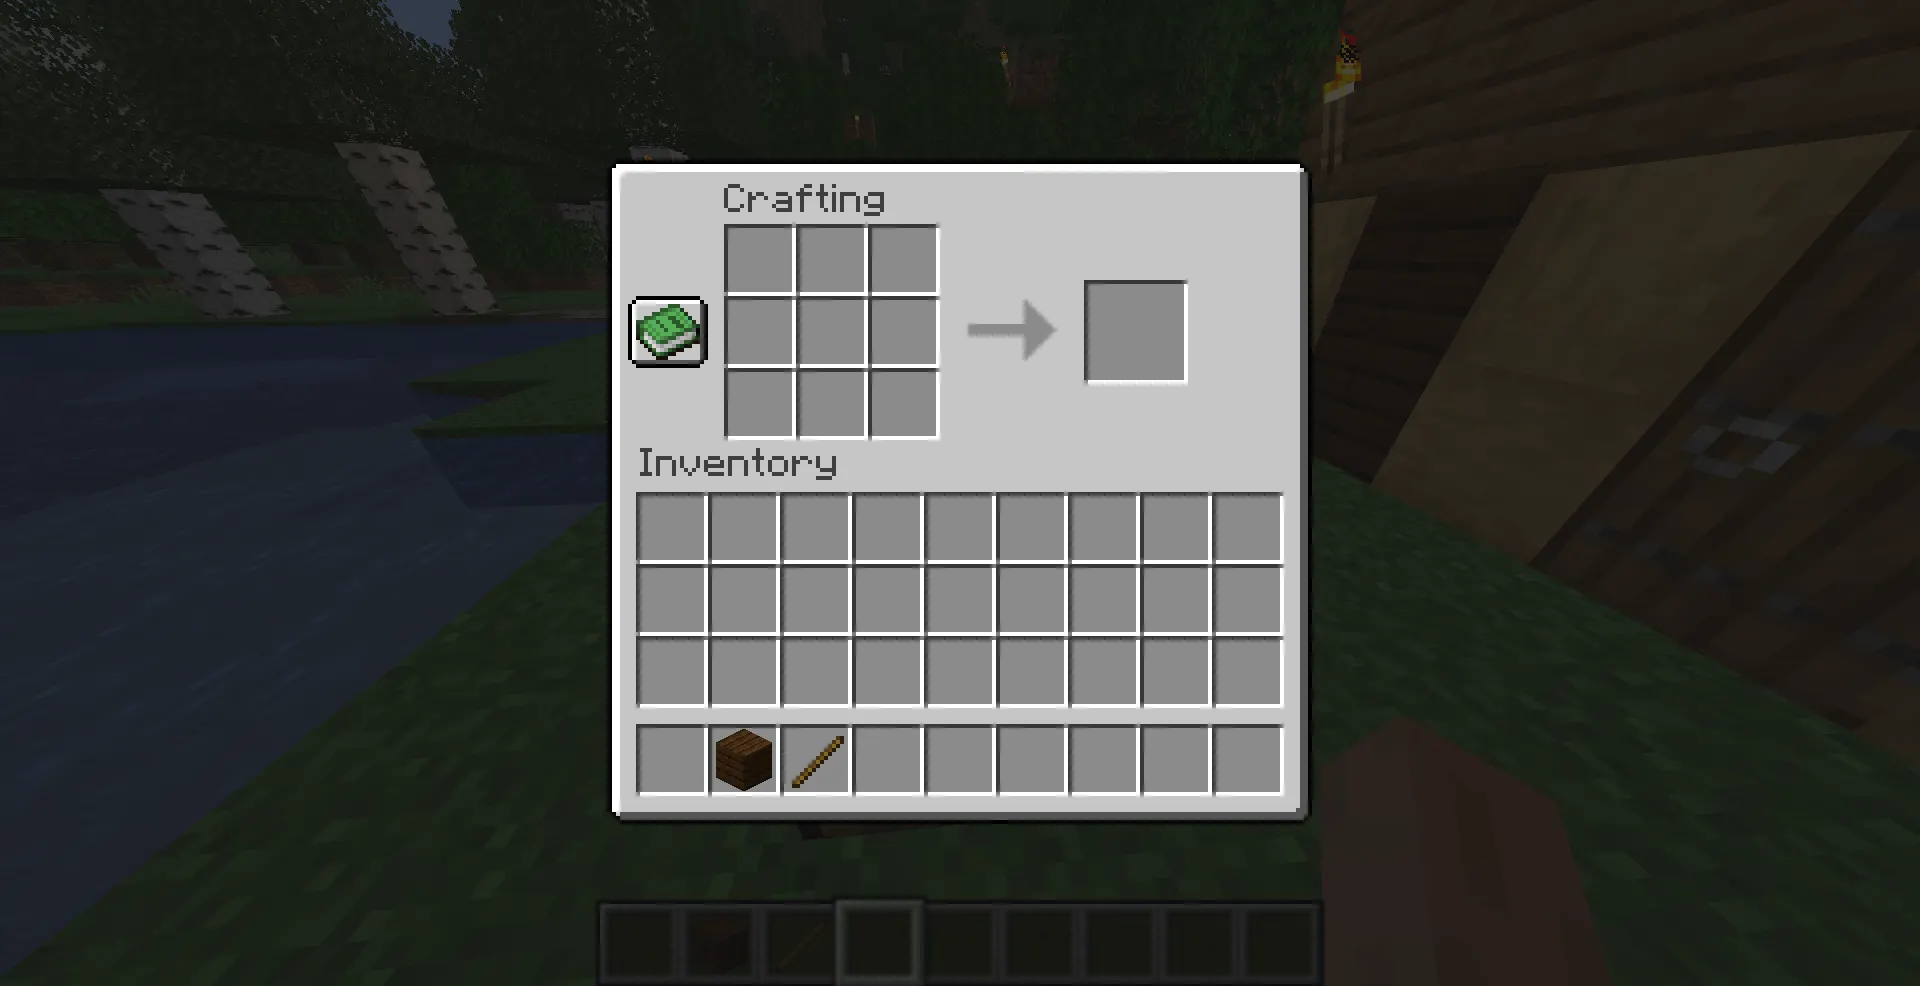
Step 3: Place the Planks in the 2x2 Crafting Grid
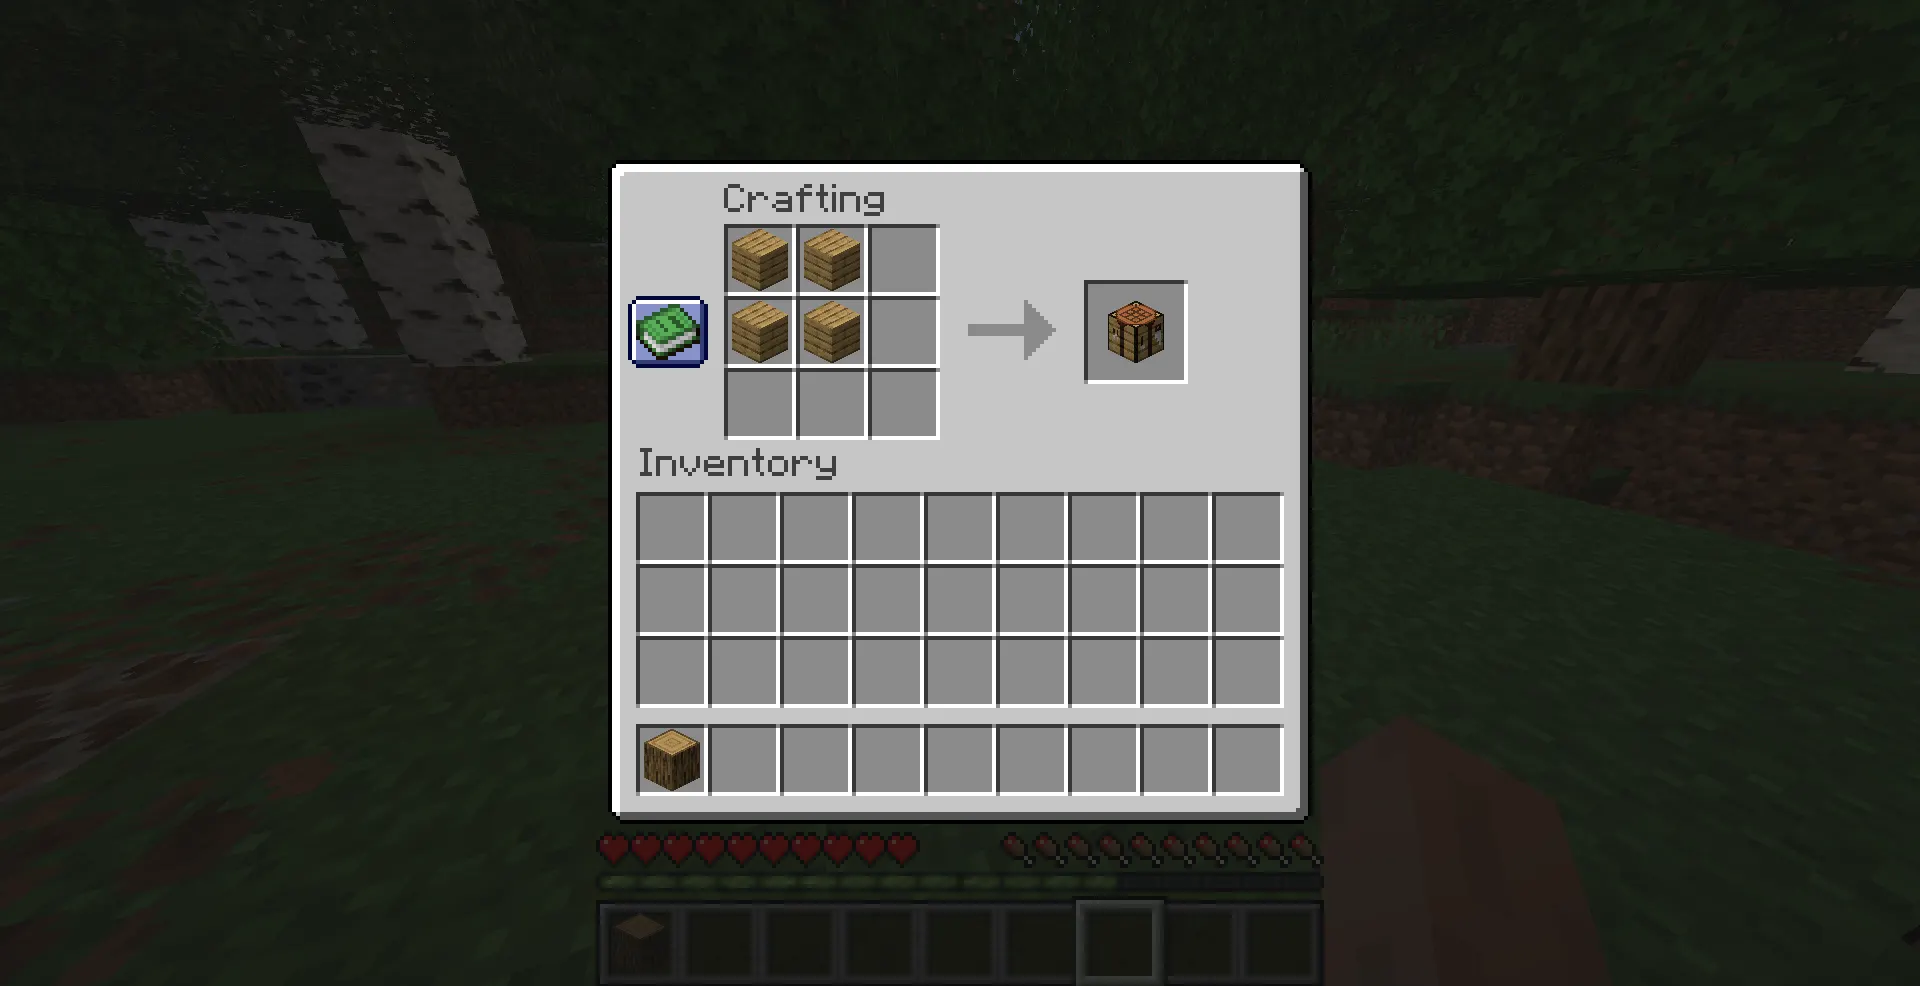
Still in your inventory screen, look back at the 2x2 crafting grid. Now place 1 wooden plank in each of the four slots — top-left, top-right, bottom-left, and bottom-right.
Every slot must be filled. The recipe requires a complete 2x2 square of wooden planks.
Once all 4 slots are filled, you'll see a crafting table appear in the output slot. This is the Minecraft 3x3 crafting grid unlocked in block form — your key to everything else.
Note: You can mix wood types if you want. A plank of oak in one slot and a plank of birch in another will still produce a crafting table. The game doesn't distinguish between wood types for this recipe.
Step 4: Move the Crafting Table to Your Inventory
Click or drag the crafting table from the output slot into your inventory or hotbar. Once it's in your inventory, it's ready to place.
If you put it in your hotbar (the row at the bottom of your screen), you can select it quickly and place it without having to open your inventory again.
How to Place and Use a Crafting Table
Select the crafting table in your hotbar. Aim at a flat surface — the ground, a dirt block, or any solid surface nearby. Then right-click (PC), press the left trigger (console), or tap the block (mobile) to place it.
Once it's placed, interact with it the same way: right-click, left trigger, or tap. This opens the crafting table interface.
You'll immediately notice the difference. Instead of the small 2x2 grid from your inventory, you now have a full 3x3 crafting grid with 9 open slots. This is where the real crafting begins.
Here's what that extra space lets you make that you couldn't before:
-
A wooden pickaxe requires 3 planks in the top row and 2 sticks beneath — a shape that needs 3 columns, impossible in 2x2
-
A furnace requires 8 cobblestone arranged in a ring — definitely needs 3x3
-
A chest needs 8 planks in a ring — again, 3x3 only
-
A bow uses a string and sticks in a diagonal pattern across 3 rows
The crafting table also works with Minecraft's built-in recipe book. Click the book icon on the left side of the crafting interface to browse all available recipes. If you're missing an ingredient, it'll be highlighted so you know exactly what to go collect.
Why the Crafting Table Is So Important in Survival Mode
Let's be direct: the crafting table is the most important block in the entire game for a new player.
You can technically survive the first few minutes without one. But you can't thrive. Here's why this block sits at the center of every survival progression path:
Tools Start Here
Your bare hands can break dirt and wood, but they're painfully slow against everything else. The moment you have a crafting table, you can build a wooden pickaxe and start mining stone. Once you have a stone, you make a stone pickaxe. With stone tools, you go deeper and find coal and iron. From iron, you get iron tools and armor.
That entire chain — which defines most of your first Minecraft day — starts with the crafting table.
Torches Require It Too
You might think torches are simple enough for the inventory grid. They're not. A torch needs 1 coal (or charcoal) and 1 stick in a vertical line — which is a 1x2 recipe that technically fits in 2x2, but producing sticks to feed that recipe quickly requires planks, and having a crafting table nearby just makes the whole workflow faster and more efficient once you're inside a cave.
Dark caves kill beginners fast. Getting torches made quickly is a survival priority.
Chests Give You Storage
On day one, your inventory fills up quickly. A chest gives you 27 extra storage slots. But the chest recipe uses 8 wooden planks arranged in a hollow square — that's a 3x3 recipe. Without your crafting table, there's no chest. No chest means you're either dropping items or running back and forth.
The Furnace Unlocks Smelting

Raw ore is useless without a furnace to smelt it. A furnace needs 8 cobblestone in a ring. Cobblestone is your first mined material. But the furnace recipe needs a 3x3 grid, so again — crafting table first.
Once you have a furnace, you can smelt iron ore into iron ingots, cook food to restore hunger, and make charcoal if you haven't found coal yet.
The progression loop looks like this: Crafting Table → Tools → Stone → Furnace → Iron → Everything else. It all starts at that wooden block.
What to Craft Next After Your Crafting Table
Once your crafting table is placed and ready, here's what to make in roughly this order:
1. Sticks
Recipe: 2 wooden planks, stacked vertically anywhere in the grid. Sticks are the base ingredient for almost every tool and weapon in the game. Make a stack right away.
2. Wooden Pickaxe
Recipe: 3 planks across the top row, 2 sticks in the center column going down. Your first real tool. It lets you mine stone, which is the gateway to everything better. Wooden pickaxes are weak and break quickly, but you only need them long enough to get 3 pieces of cobblestone for a stone pickaxe.
3. Wooden Axe
Recipe: 2 planks in an L-shape on the left side, 2 sticks down the right. Chops wood significantly faster than your hands. Useful if you need to gather a lot of wood quickly.
4. Wooden Shovel
Recipe: 1 plank at the top, 2 sticks beneath in a vertical line. Moves dirt, sand, and gravel much faster. Good to have before you try to clear land or dig a shelter.
5. Furnace
Recipe: 8 cobblestones arranged in a 3x3 ring (leave the center empty). First, mine at least 8 cobblestones with your new pickaxe, then come back and build this. The furnace is your second most important crafting block after the table itself.
6. Chest
Recipe: 8 wooden planks in a 3x3 ring (leave center empty). Build this on day one before your inventory overflows. Place it near your crafting table so you have a proper base setup: table + chest side by side.
7. Torches
Recipe: 1 coal (or charcoal) on top of 1 stick. Make these before nightfall or before entering any cave. They light up the area and prevent Mob spawns nearby.
8. Crafting Table (Spare)
Recipe: Same as before — 4 planks in 2x2. Experienced players always keep a spare crafting table in their inventory. If you're exploring far from home and need to craft on the go, having one ready to place and break is a lifesaver.
Beginner Tips for Using Your Crafting Table Effectively
Always Keep One in Your Hotbar
You never know when you'll need to quickly craft something mid-adventure. Keep a crafting table in one of your 9 hotbar slots while exploring. You can place it, craft what you need, then break it with your hand to pick it back up. It doesn't get destroyed when you break it.
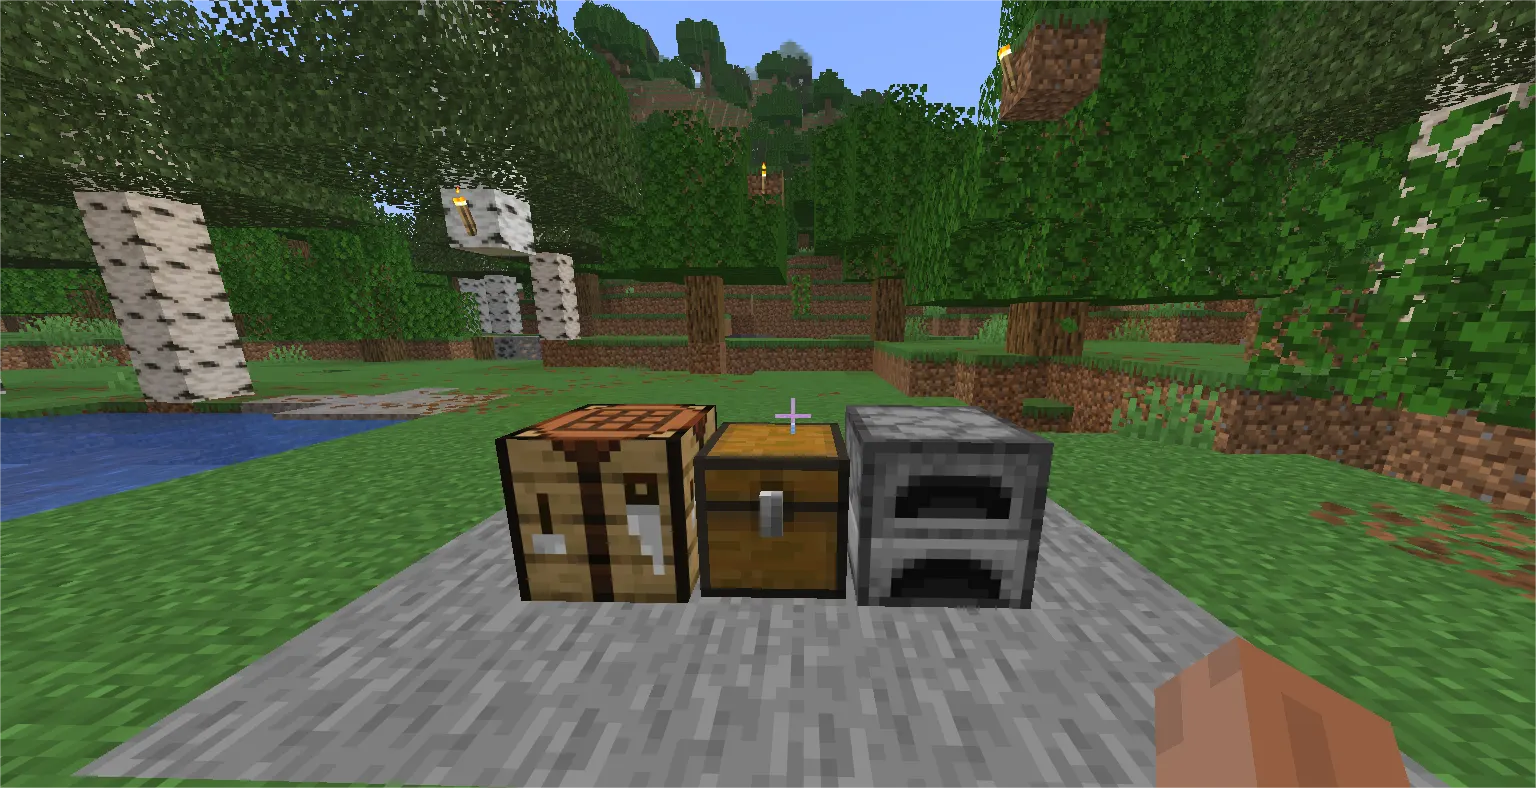
Place It Near Your Spawn or Base
Set up your crafting table in a safe spot close to where you sleep. You'll be visiting it constantly in the early game. Pairing it with a chest and a furnace creates a compact, efficient starter base that covers all your Early crafting needs in one spot.
Use the Recipe Book
Open your crafting table and click the small book icon on the left side. The recipe book shows every recipe you've encountered in the game, along with a search bar. If you don't remember a recipe layout, check here first instead of guessing.
Upgrade Materials Early
Your first tools will be wood. Get stone tools as fast as possible — they last longer and work faster. Then move to iron. Don't get attached to wooden tools. They're stepping stones, not long-term solutions.
Craft in Batches
If you need 20 torches, gather all the coal and sticks at once before opening your crafting table. Crafting in batches saves time and prevents you from constantly running back and forth between your base and a cave.
Protect Your Crafting Table at Night
On the First night or two, keep your crafting table inside your shelter. Creeper explosions can destroy nearby blocks, and losing your crafting table early in a survival run is a genuine setback.
Common Beginner Mistakes (And How to Avoid Them)
Using Logs Instead of Planks
Raw wood logs cannot be placed directly into the crafting table recipe. You must first convert the log into wooden planks in your inventory crafting grid. This trips up almost every first-time player. Remember: logs → planks → crafting table.
Leaving a Slot Empty
The crafting table recipe needs all 4 slots of the 2x2 grid filled. If even one slot is empty, nothing will appear in the output. Make sure all four corners have a plank before expecting the result to show up.
Forgetting to Actually Place It
You've crafted the table. It's in your inventory. Now, many beginners forget the final step: you have to place it on the ground and interact with it. Just having it in your inventory doesn't give you 3x3 crafting. You need to place it and open it.
Leaving It Behind When You Move Base
As you explore and eventually relocate, beginners often forget to grab their crafting table before moving on. Always pick it up (break it with your hand) when abandoning a temporary camp.
Ignoring the Recipe Book
The recipe book is built into the crafting table interface. Too many new players guess at recipes and waste materials when they could just open the book and see the correct layout in seconds.
Java vs. Bedrock: Is the Recipe Different?
No. The crafting table recipe is identical in both Java Edition and Bedrock Edition: 4 wooden planks arranged in a 2x2 pattern.
The interface looks slightly different between editions — Bedrock has a touch-friendly UI and some layout differences — but the core recipe and function are the same. You won't need to learn a separate process depending on your platform.
If you're playing on console, mobile, or Windows 10/11 Bedrock Edition, this guide applies to you just as much as it does to Java Edition players on Mac or PC.
Conclusion
Learning how to craft a crafting table in Minecraft is the first real milestone in your survival journey. It takes one log, four planks, and about thirty seconds — but what it unlocks is the entire game.
From the moment that the crafting table is placed and open in front of you, you have access to the full Minecraft beginner crafting guide progression: tools, torches, chests, furnaces, and every other item that turns a hostile world into a place where you can actually build something.
This isn't a block you grow out of either. Veteran players use crafting tables just as often as beginners. The difference is that experienced players keep one in their inventory and set up efficient base layouts that make crafting fast and painless.
Place your crafting table, open the recipe book, and start working through that list of essential items. The first wooden pickaxe leads to stone, stone leads to iron, and iron leads to a real base that can survive anything the game throws at you.
Your first day in Minecraft always starts the same way. Tree. Log. Planks. Crafting table. Everything after that is up to you.