Finding Iron Fast in Minecraft: Best Y Levels, Methods, and Survival Tips
You spawn in, gather some wood, build a Crafting table, and suddenly you're staring at a stone pickaxe, wondering where all the iron went. It happens to everyone, even players with hundreds of hours. Iron feels weirdly elusive sometimes, and since the Caves & Cliffs update reshuffled ore generation completely, a lot of old strategies don't work anymore.
This guide cuts straight to what actually works. No fluff, no outdated Y-level advice from 2019. Just practical methods from someone who has burned way too many nights in Survival mode trying to gear up fast.
Quick Answer: Finding Iron Fast in Minecraft
If you need the short version before digging into details:
-
Best Y level for iron: Y=16 for peak underground concentration, or anywhere from Y=232 down to Y=-24 (iron generates across a huge range, but density peaks around Y=16)
-
Fastest early-game method: Find a cave entrance and explore rather than strip mining — iron is everywhere in natural caves, especially near exposed stone walls
-
Best terrain: Mountains and exposed cliff faces. Iron now generates in massive veins near the surface of mountain Biomes.
-
Cave vs strip mining: Caves win the early game. Strip mining is more consistent mid-game when you have food and gear to sustain it.
Why Iron Is the Most Important Early-Game Resource
Iron is the bottleneck for almost everything in early survival. You need it for your first real pickaxe, a sword that can actually defend you, a bucket for water and lava control, a shield, an anvil, armor — the list is long. Getting iron fast doesn't just speed things up. It changes the whole arc of your first few in-game days.
Stone tools break before you've made real progress. Wood tools are embarrassing. The jump from stone to iron is bigger than any other tool upgrade in the game. Iron also limits your access to diamonds and netherite, since you need iron tools to mine gold and a full iron kit before venturing into the Nether comfortably.
Early game without iron feels fragile. With even half a set of iron armor and an iron sword, the game opens up fast.
Best Y Levels for Finding Iron in Minecraft
This changed significantly with the Caves & Cliffs update, so if you've been playing since before 1.18 and haven't updated your mental model, here's the current state:
Iron generates between Y=-64 and Y=320, which is basically the entire world height. But the distribution isn't even.
Underground Iron (Standard Caves)
Iron ore is most dense around Y=16 when you're underground. The concentration drops off as you go further down toward Y=-64 (where deepslate iron becomes rarer compared to the other deepslate ores taking over) and as you go higher above Y=64.
The sweet spot for consistent underground iron is roughly Y=6 to Y=40. You'll find it in normal stone, so it shows up easily — no deepslate confusion, no needing a silk touch pickaxe to identify it.
Mountain and Surface Iron
Here's what a lot of players miss: mountains generate massive iron veins near the surface, sometimes starting as high as Y=200+. The Windswept Hills, Jagged Peaks, and Stony Peaks biomes are basically iron mines waiting to be walked into.
If you spawn near mountains, this should be your first move. You can gather more iron in ten minutes of surface exploring than in an hour of underground digging.
Fastest Ways to Find Iron in the Early Game
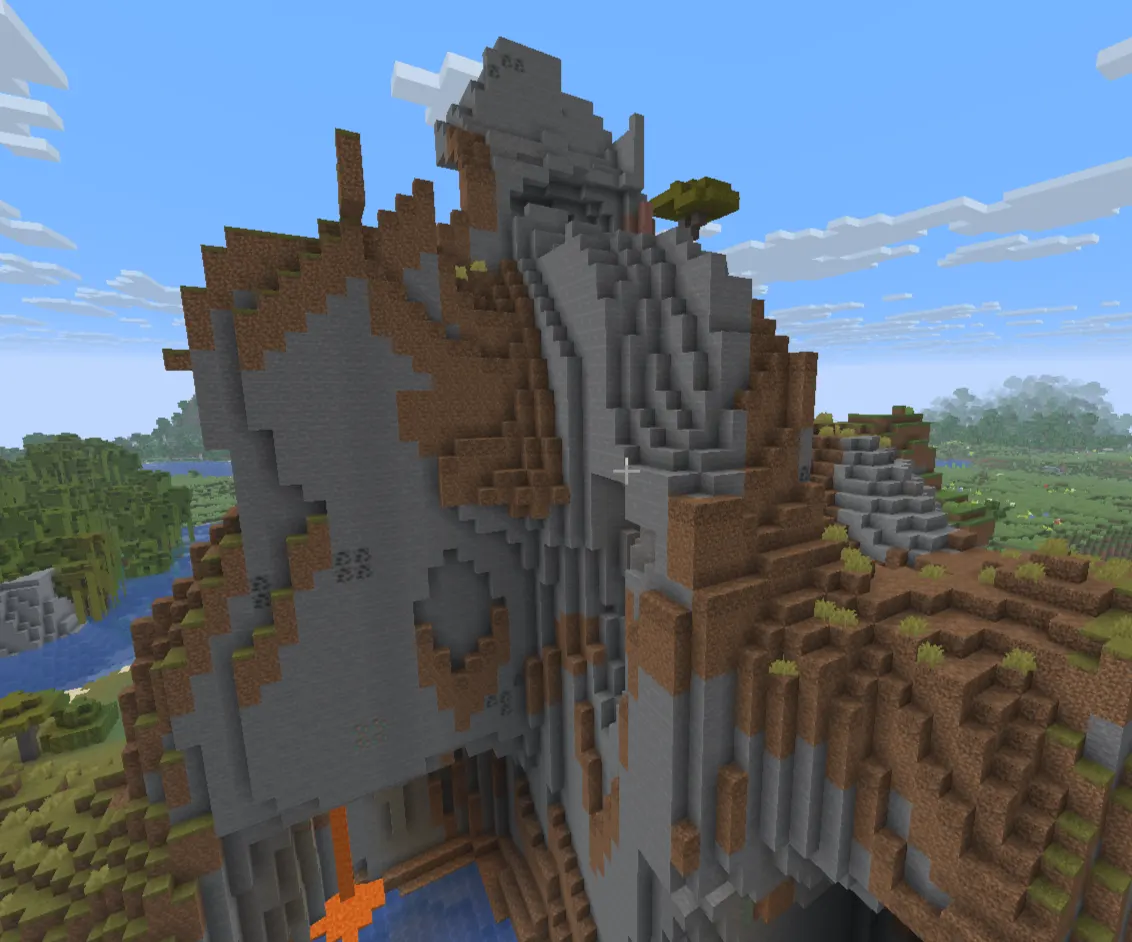
1. Check Mountain Biomes First
If mountains are anywhere near your spawn, go there before you dig a single block underground. Iron is generated in massive blobs near the surface of mountain biomes. You'll often see iron ore exposed right in cliff faces or just a few blocks below the grass line.
This isn't a minor optimization. On a good mountain spawn, you can have a full iron set before your First night ends. Walk along cliff edges, look for the light brown speckled stone, and follow it.
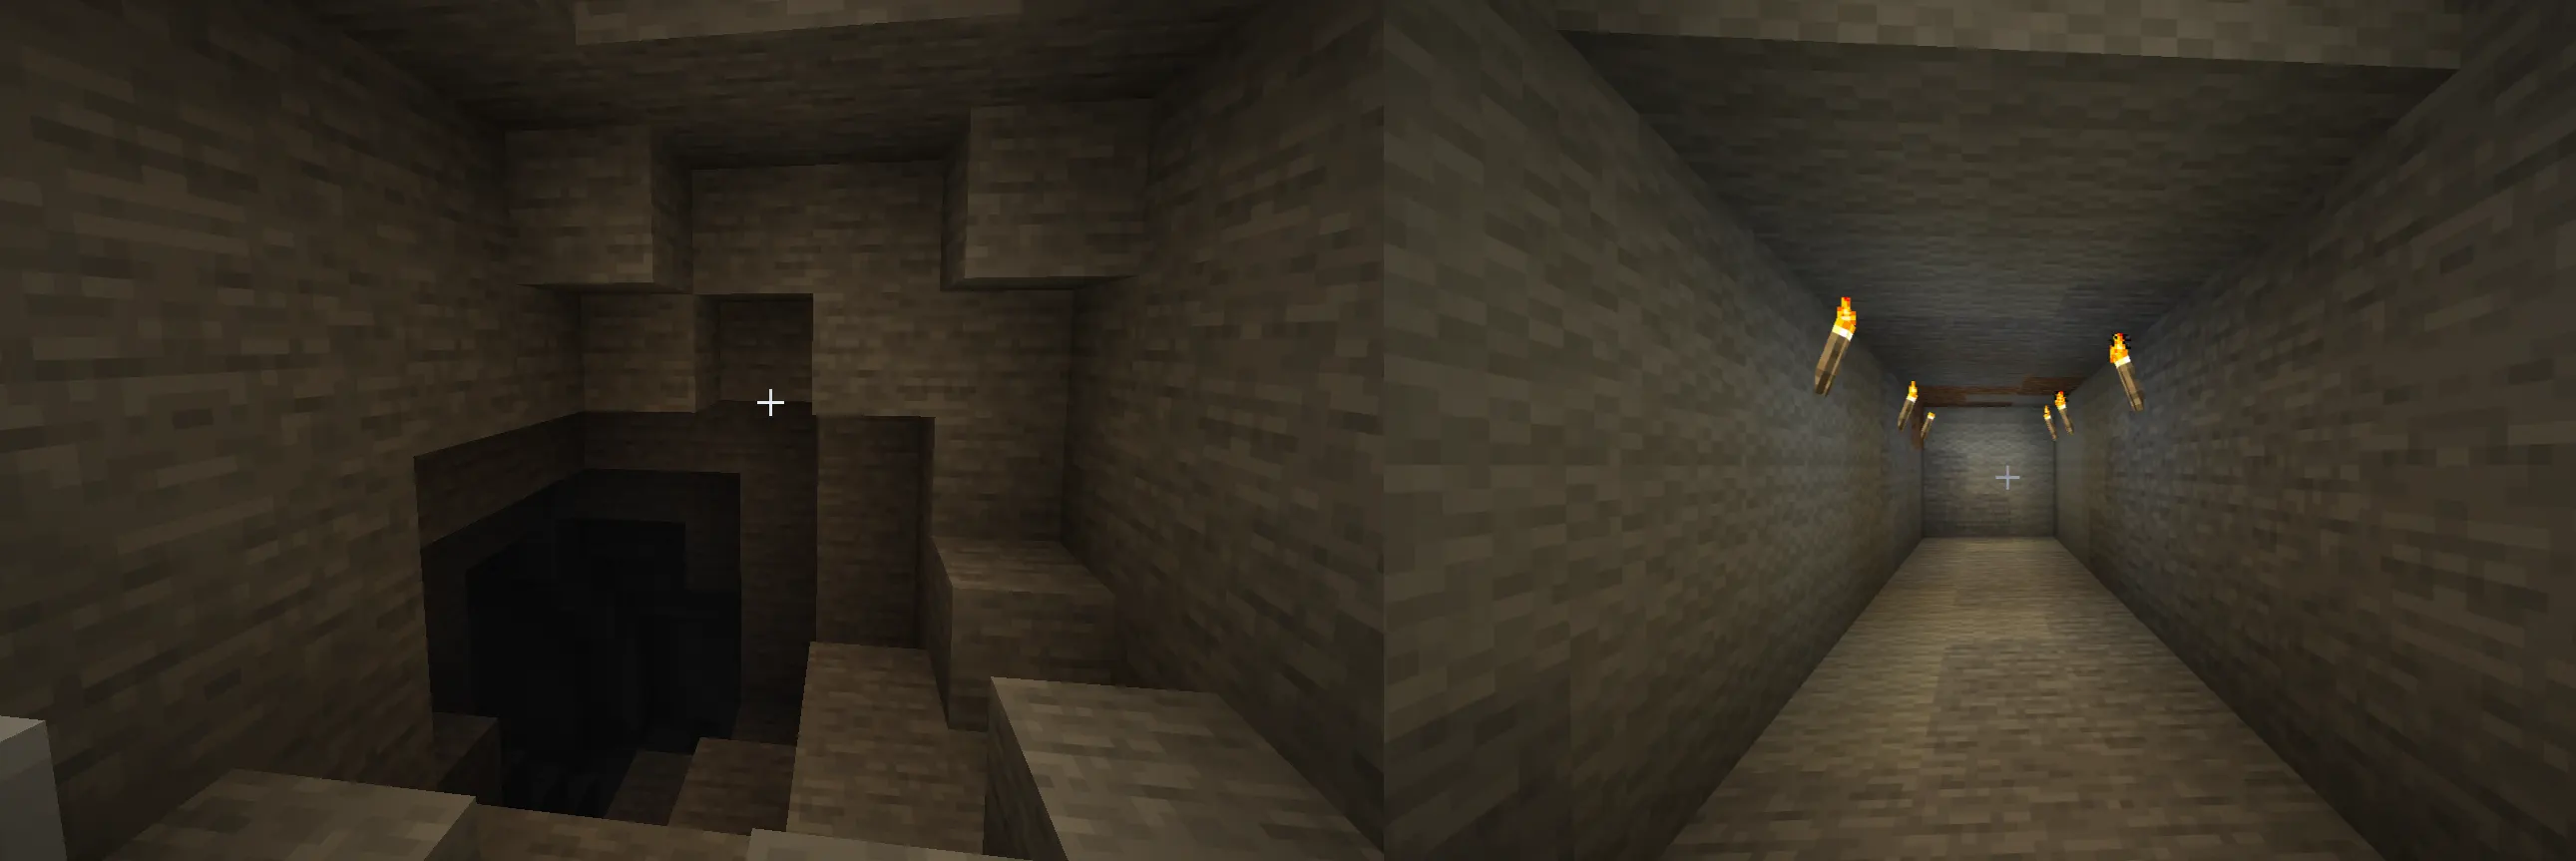
2. Cave Entrance Diving
Natural cave systems expose massive amounts of ore on their walls. When you find a cave opening, you're looking at hundreds of blocks of exposed stone — way more surface area than any strip mine you'd manually dig.
Grab some Torches and food, and start exploring. Iron spawns in clusters of 1–13 blocks, and caves in the Y=16–40 range will have them everywhere. The trick is committing to going deep enough. A lot of players peek into the surface cave, find some coal, get scared by mobs, and leave. Go further.
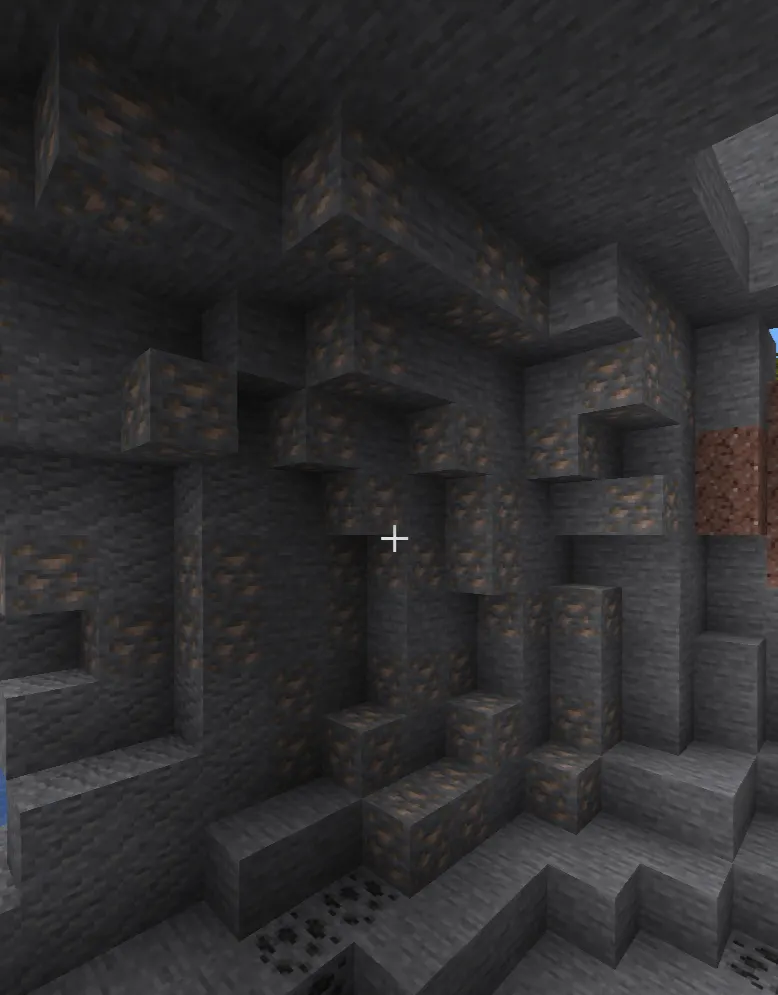
3. Ravines Are Gifts
Ravines expose deep cross-sections of the world all at once. When you find one, work the walls systematically. A good ravine can yield 30–60 iron ore without ever digging a tunnel yourself.
Check the floor too. Ravines that cut down to Y=6–20 will often expose lapis, redstone, and iron simultaneously.
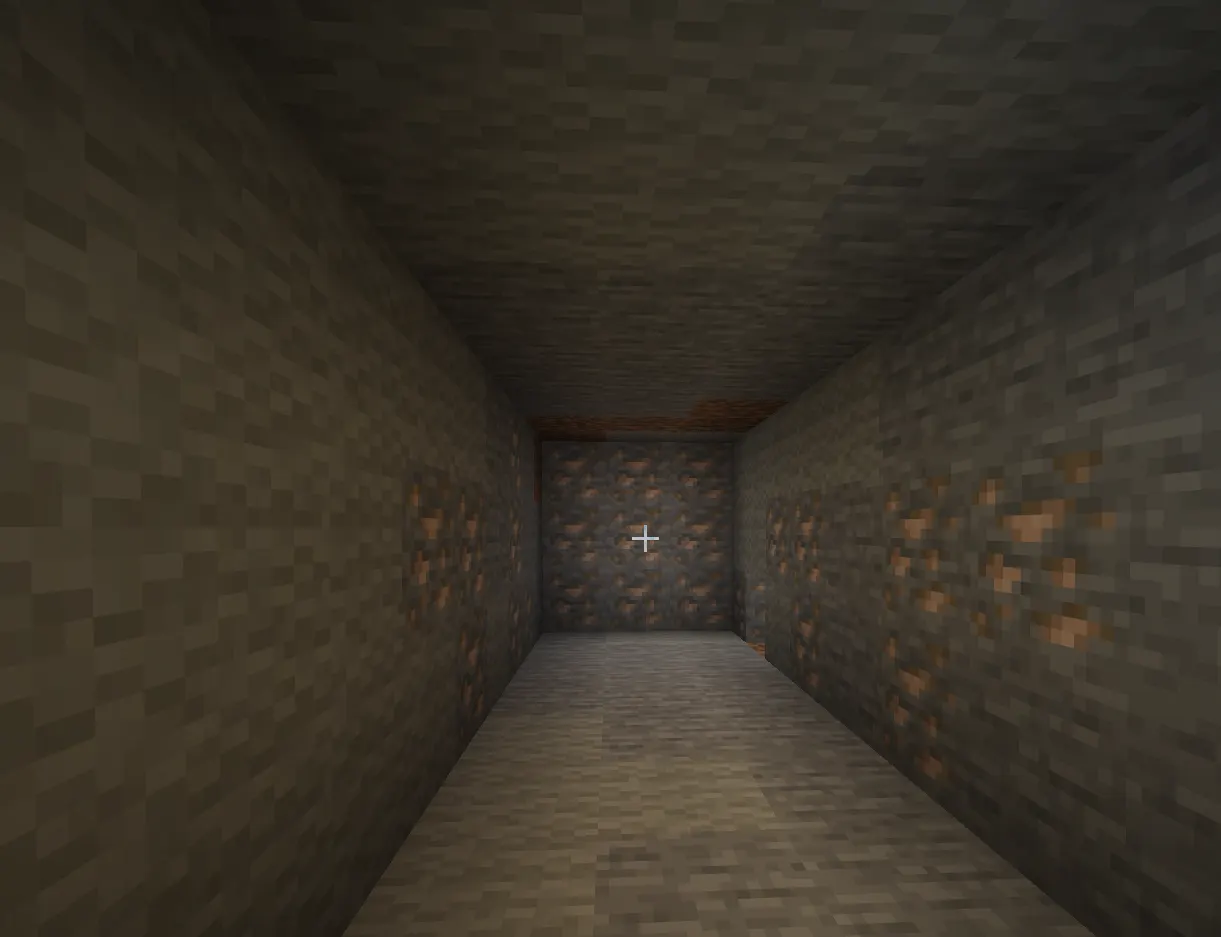
4. Strip Mining at Y=16 (Mid-Game)
Strip mining isn't the fastest method for iron, but it's the most reliable one once you have food and decent tools. Dig a main corridor at Y=16, then branch tunnels every 2–3 blocks. You'll hit iron consistently.
The reason to wait on strip mining: it burns food and tools fast, and in early survival, you might not have the supplies to sustain it long enough. Cave exploration is lower cost early on.
Cave Mining vs. Strip Mining for Iron
This debate comes up constantly, so here's the honest breakdown.
Cave mining advantages:
-
Zero digging until you need to branch off toward ore
-
Much faster iron per minute in the early game
-
You also find other ores, chests, and mob drops along the way
-
Works immediately with a stone pickaxe
Cave mining disadvantages:
-
Mob risk, especially at night or in deep cave systems
-
Easy to get lost without a torch trail system
-
Irregular — some caves have lots of iron, others don't
Strip mining advantages:
-
Completely predictable
-
No mob surprises (usually)
-
Good for when you need a specific amount of iron and want to guarantee it
Strip mining disadvantages:
-
Slow early on without an iron pickaxe already
-
Food-intensive
-
You go through pickaxes fast
For a fresh survival world with nothing, go caving first. Strip mine once you have a base, a bed, food storage, and at least basic iron gear to sustain the grind.
Best Biomes and Terrain for Finding Iron
Mountains (Best Overall)
Windswept Hills, Jagged Peaks, Stony Peaks, and Frozen Peaks all generate iron in extra-large veins near the surface. This is by far the best early-game situation if your seed cooperates.
Badlands (Honorable Mention)
Badlands naturally expose a lot of terrain due to erosion-style generation. You'll find mineshafts near the surface more often here, too, which can supplement your iron finds with chest loot.
Anywhere With Caves
Honestly, biome matters less underground once you're at Y=6–40. The cave generation in 1.18+ is so massive that a good cave system anywhere beats surface hunting in the "wrong" biome.
Avoid Dense Forest Spawns Early
Forests are fine for wood but terrible for iron hunting. The flat terrain hides cave entrances; there are no cliff faces to scan, and you end up digging blind, hoping to hit a cave. If you spawn in a forest, walk until you find hills or cave openings.
How the Caves & Cliffs Update Changed Iron Spawning
Before 1.18, iron was most common around Y=5–54, with the sweet spot around Y=11. Players strip mined at Y=11 for everything — iron, gold, diamonds, all in the same range.
That's gone now. The new ore distribution spreads iron across a much wider range and adds the mountain surface bonus. Y=11 still works fine, but it's no longer the obvious best choice.
The bigger change is the world height. Worlds now go from Y=-64 to Y=320, which doubled the underground space. All that new deep cave content pushed iron distribution further up in the priority list for players who cave explore rather than strip mine.
The large iron ore veins introduced with 1.18 are also worth knowing about. Occasionally, you'll find a vein of 10–13 iron ore in a single cluster — much bigger than the old 1–9 vein size. These show up more reliably in the Y=6–20 range.
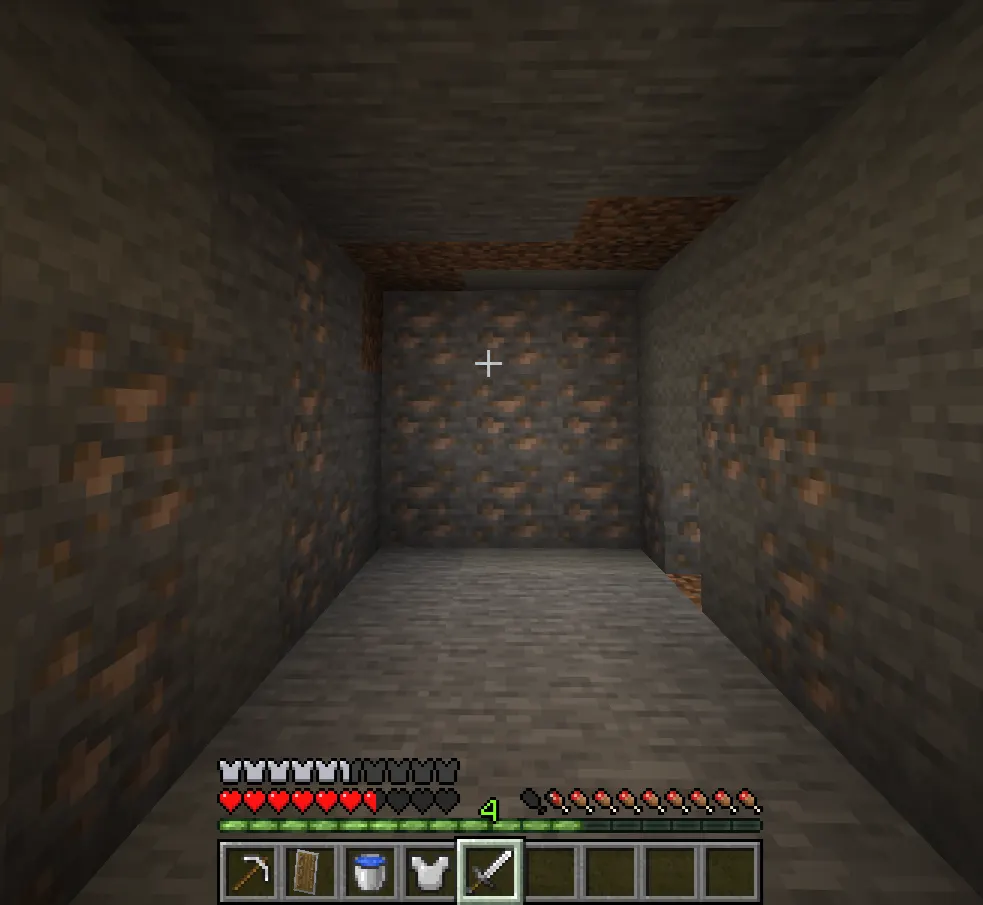
Tools You Actually Need Before Mining
Don't go underground without these:
-
Stone pickaxe (at minimum). Wood pickaxe works on iron, but takes forever. Get stone first.
-
At least 16 torches. You'll use more than you think. Running out of torches underground is a great way to lose all your iron to a Creeper.
-
Food. At least 10 pieces of bread or 5 cooked meats. Cave exploration drains hunger, and if you're sprinting away from a mob,s it goes faster.
-
A crafting table. Either carry one or leave one just inside the cave entrance. You'll want to upgrade tools on the fly.
-
A bed (optional but smart). If you're going deep, set a new spawn point before descending past Y=30.
What you don't need: diamond sword, fularmornd, and enchantments. Players who wait until they're "prepared" often just waste time. A stone sword and leather/chainmail get you through early cave runs.
Common Mistakes Players Make When Searching for Iron
Digging straight down. Still happens. Don't. You fall into lava or a cave drop and lose everything.
Mining at Y=0, looking for everything at once. At Y=0–4, you're competing with deepslate coverage, which makes iron look like deepslate iron ore (darker, harder to spot), and the ore concentrations are lower than slightly higher up.
Ignoring the ceiling and walls. Iron hides above you constantly. Look up when caving. A lot of players scan the floor out of habit and walk past ore embedded in the ceiling.
Leaving before it gets good. Shallow cave systems (Y=40+) tend to have less ore density. If you've been in a cave for two minutes and only found coal, keep going down rather than giving up.
Not smelting in batches. Every time you smelt 8 iron ore one at a time, you're wasting time. Fill the furnace, stack fuel underneath, and walk away to do something else while it runs.
Forgetting Fortune. Once you have an enchanting table, Fortune III on an iron pickaxe is huge. Raw iron drops 1–4 ingots per ore block with Fortune III instead of 1. That multiplies your haul significantly without any extra mining.
Smelting and Using Iron Efficiently
A full Furnace smelts 8 items per fuel unit with wood, so a stack of logs (64) smelts 64 iron ore exactly. Don't waste coal on smelting iron when you first start — coal is better saved for torches and later use. Use wood logs or planks as smelting fuel in the early game.
Smelt everything before sorting. Raw iron takes up more inventory space than iron ingots (different stack behaviors with crafting automation later), and knowing your exact ingot count helps you plan what to craft.
What to Craft First With Iron
The order matters depending on what you're doing, but a solid early-game sequence:
-
Iron pickaxe — immediately. The speed difference over stone is substantial.
-
Iron sword — before going deeper.
-
Bucket — underrated. You can grab water for mob trap moats, lava control, and infinite water sources.
-
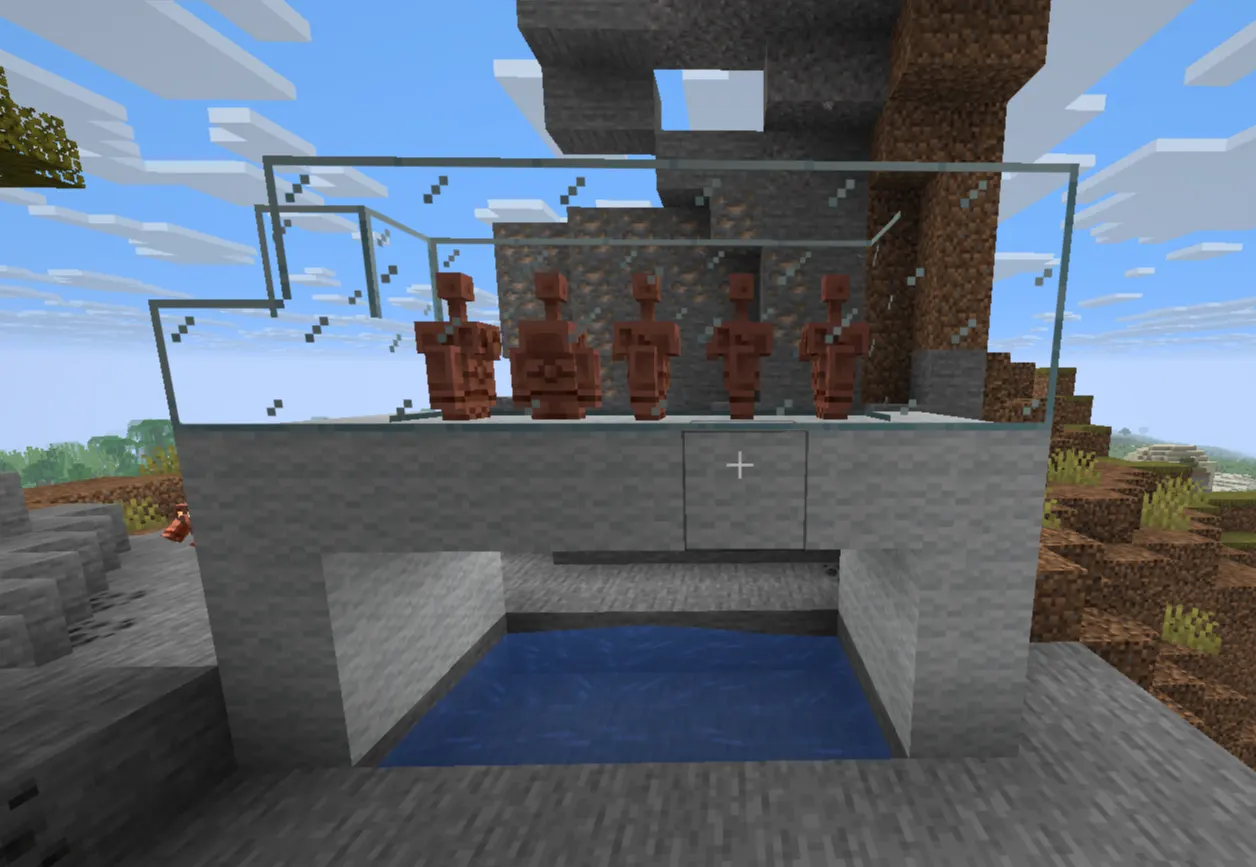
Iron armor — start with the chest plate (biggest protection value per iron cost), then helmet, then boots, then leggings.
-
Shield — absolutely worth it before the Nether. Blocks crossbow bolts and sword hits completely.
Iron for anvils and hoppers can wait until you have surplus. Don't use your first 20 ingots on an anvil.
Fast Iron Farming Strategies
Once you're past the early game and want a consistent iron supply:
Iron Golem Farm
This is the endgame answer. Iron golems drop 3–5 iron ingots when killed. A basic iron golem farm using a village mechanic can produce hundreds of ingots per hour passively. It's a mid-to-late game investment (requires beds, villagers, a proper killing mechanism), but once built, you'll never mine iron manually again.
Dedicated Mining Sessions at Y=16
If you just want a big stack of iron fast without farm infrastructure, go to Y=16 with a Fortune III pickaxe, full iron or diamond armor, food, and mine branch tunnels for 20–30 minutes. You can realistically gather 150–300 raw iron in a solid session.
Trade Stacked Runs
When caving for other reasons (diamonds, ancient debris), always bring a separate hotbar slot for iron. Mine every iron vein you see, even if you don't immediately need it. Iron stored is always useful — it goes into armor stands, hoppers, rails, cauldrons, and eventually netherite upgrades.
Why You Might Be Struggling to Find Iron (And How to Fix It)
If iron genuinely feels impossible to find, here's what's probably happening:
You're caving too shallow. If you're not getting below Y=40, you're in lower ore density territory. Push deeper.
You're in a bad biome for surface hunting. Move toward the mountains or find a ravine.
Your world might be 1.17 or older. Ore generation changed significantly. If you're playing on an older world that hasn't generated new chunks, the new mountain iron spawn rates won't apply to already-generated terrain.
You're not exploring enough cave branches. Iron doesn't line the main corridors — it hides in the side walls. Branch into every tunnel and dead-end rather than following the main path only.
You're torching too slowly. Fear of the dark makes players timid. Move faster with more torches, mark cave entrances with a distinctive block (pumpkin, colored wool, whatever), and commit to going deeper.
Advanced Tips Experienced Players Use
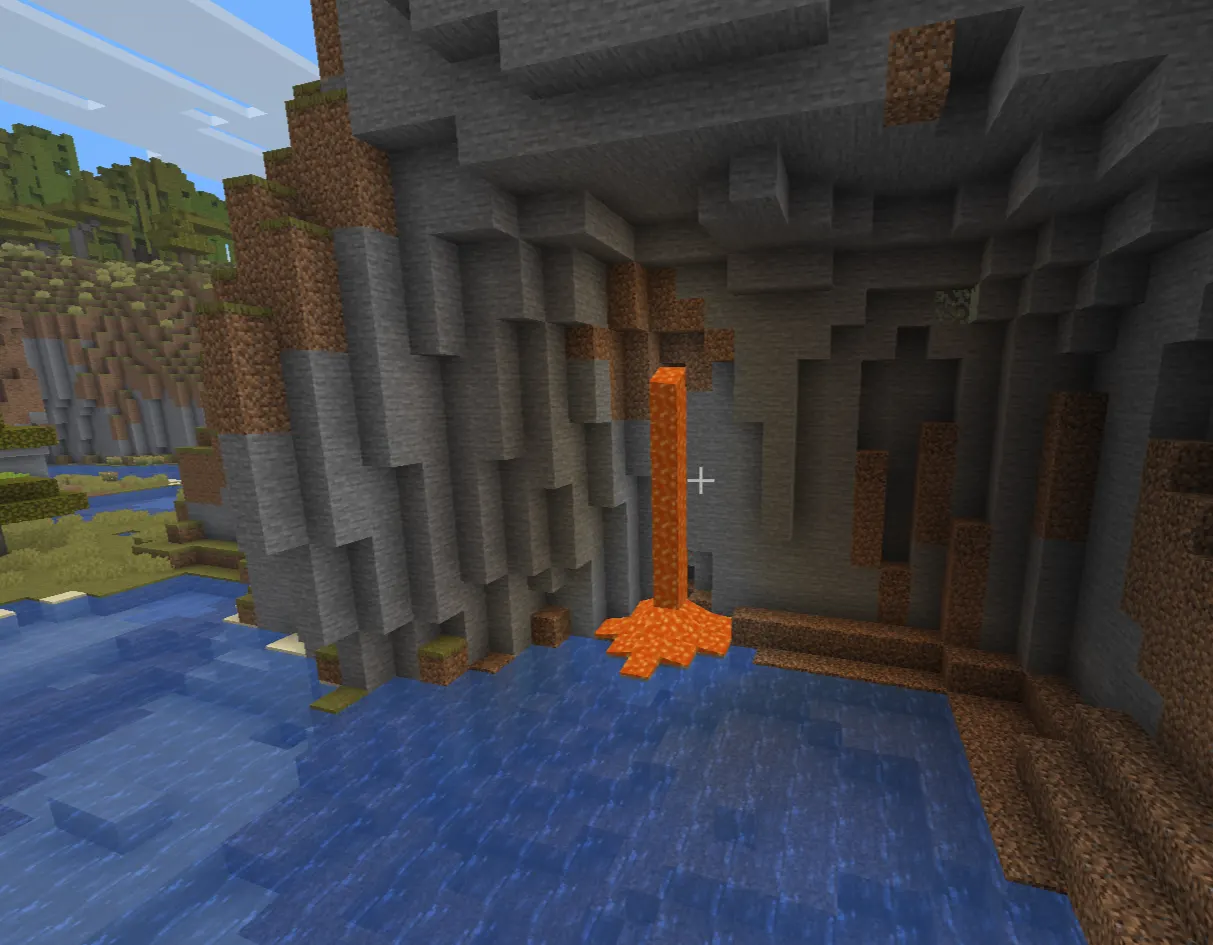
-
Lava pools at Y=6–11 almost always have iron and gold nearby. The heat-related logic from the older generation still somewhat holds — lava pools correlate with ore density in that range. When you see lava, mine the surrounding stone walls.
-
Look for gravel patches underground. Gravel and ore tend to generate near each other in the same cave systems. A gravel deposit at Y=15–20 is often near iron.
-
Carry a spare pickaxe. Sounds obvious, but running out of picks mid-cave and having to retreat is a momentum killer. Bring a backup at a minimum until you have a diamond.
-
Use the sound cue. If you hear cave sounds (drips, wind, ambient groans), you're near a cave pocket. Mine toward it instead of continuing your current tunnel — unexplored cave space almost always has more ore on the walls than a manually dug tunnel.
-
Check mineshafts. Generated structures like abandoned mineshafts and strongholds intersect with natural cave systems and expose a ton of ore on their walls. Mineshaft chests also sometimes hold iron ingots directly.
Conclusion: Mine Smarter, Not Longer
Iron feels scarce when you're digging in the wrong places. It doesn't feel scarce once you know where to look.
For fast early game iron: find mountains, scan cliff faces, and dive into natural cave systems. Skip the random digging. Get below Y=40 before you give up on a cave. Keep your eyes on walls and ceilings, not just the floor.
The Caves & Cliffs update actually made iron more accessible than it used to be — mountain biomes hand it to you at the surface, and the new cave systems expose more ore per exploration session than the old tiny cave pockets ever did. The learning curve is just updating old habits. A stone pickaxe, a stack of torches, some bread, and a cave entrance. That's your setup. Everything else follows from actually going deep enough and staying long enough to find what you're looking for.
Get your iron, get your diamond pickaxe, and get to the Nether. The clock's already ticking.