
Trial Chambers in Minecraft 1.26: Complete Loot & Survival Guide
Quick note before we get into it: there's no version actually called "1.26." Mojang moved to yearly game drops in 2026, so what everyone still calls "1.26" is really 26.1 (Tiny Takeover) and 26.2 (Chaos Cubed). Trial Chambers themselves are older than both. They arrived in the Tricky Trials update back in June 2024, but they're still fully intact in your current game, and they're still one of the best mid-game structures Minecraft has ever added.
If you've got diamond gear and nowhere to spend it, this is where you go. Trial Chambers are underground combat dungeons where you fight scripted waves of mobs for keys, then spend those keys on vaults full of gear you can't get anywhere else. The Mace. The Heavy Core. Flow and Bolt armor trims. A trident-tier weapon locked behind actual combat instead of a chest you just walk up to.
This guide covers everything: where to find a chamber, what to bring, how Trial Spawners actually decide what to throw at you, which mobs matter, how the key-and-vault loop works, and what separates a normal run from an Ominous one. Let's get into it.
What Are Trial Chambers in Minecraft?

A Trial Chamber is a large underground structure made of copper and tuff blocks, built specifically to give you combat encounters you can't get by mining around randomly. Instead of a static dungeon with a spawner sitting in the dark, every fight here is triggered on purpose: you walk toward a Trial Spawner, it notices you, and the fight starts. Nothing ambushes you from outside the intended encounter.
Structurally, each chamber is a mess of connected rooms and corridors, all generated differently every time. One chamber might funnel you through tight tunnels with a Spider spawner around every corner. The next might open into a giant vaulted room built entirely around a breeze fight. There's no fixed layout to memorize, which is honestly the point. You're meant to explore carefully rather than run a route you've done a hundred times
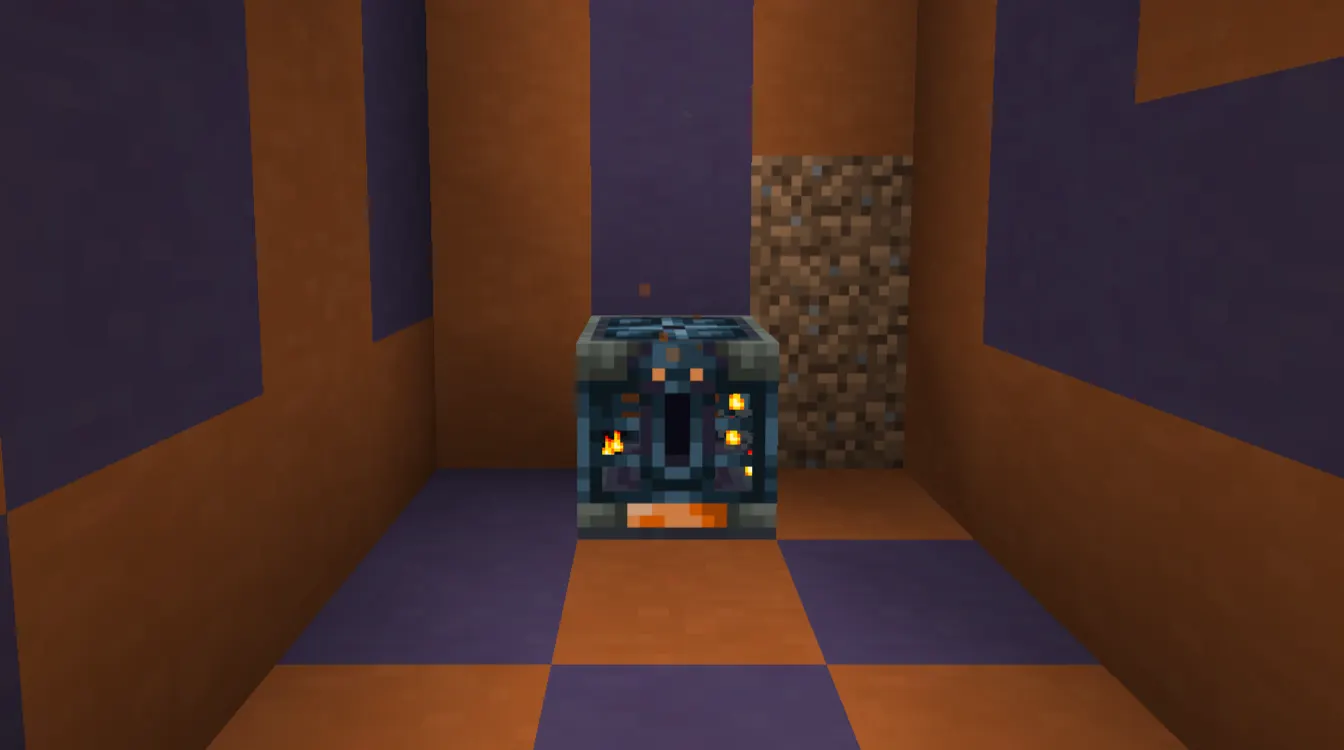
Every room and corridor except the entrance chamber has a Trial Spawner in it. Scattered through the structure you'll also find copper chests, decorated pots (some hold exclusive pottery sherds you can't find elsewhere), and the vaults that make the whole trip worth it. It's a mid-game structure in the truest sense: you need real gear to survive it, but the loot inside pushes you into late-game territory.
How to Find Trial Chambers in Minecraft's Current Update
The most reliable method is buying a Trial Explorer Map from a Journeyman-level Cartographer villager. Not every Cartographer sells one, so you may need to check a few villages or level one up through trades first. Once you've got the map, it points you straight to the nearest chamber the same way an ocean explorer map points to a shipwreck.
If you don't have a cartographer nearby, you're stuck exploring. Trial Chambers generate deep, roughly in the same depth band where you'd be mining for Diamonds, and they don't poke through the surface or show any obvious tell from above ground. Cave diving, mining tunnels, or exploring existing cave systems near that depth is realistically your best shot without a map. Randomly strip-mining for one is a bad use of your time; you're more likely to stumble into one while doing something else productive, like mining ore.
Structure-locating commands and world-viewing tools exist and technically work, but they bypass the actual discovery loop the structure was built around. Treat them as a Creative-mode or map-planning tool, not a normal Survival strategy. Using them to skip exploration kind of defeats the purpose of the structure existing in the first place.
What to Bring Before Entering a Trial Chamber
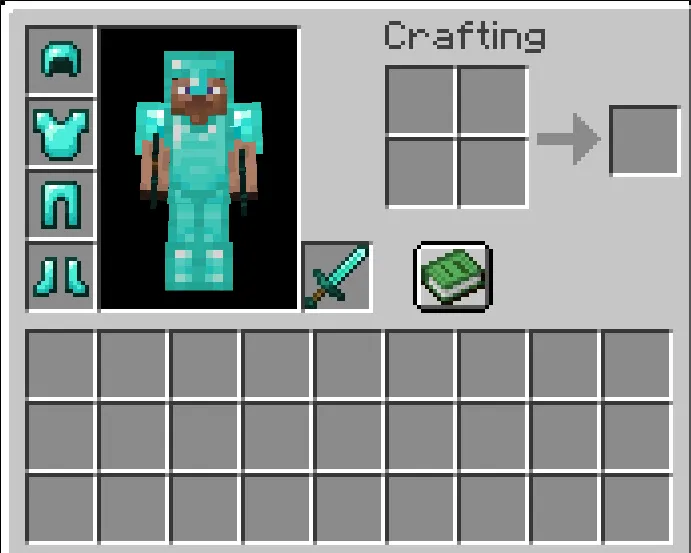
Trial Chambers are not forgiving to under-geared players. You're fighting scripted waves in enclosed rooms, sometimes with ranged mobs shooting from angles you can't easily block. Prepare like you're heading into a real fight, not a loot run.
Essential Gear
Armor: Full diamond at minimum. Trial Chambers spawn skeletons, strays, and bogged that all shoot from range, so you need enough defense to eat a few arrows without panicking.
Weapon: A good sword or axe with Sharpness or Sweeping Edge. You'll be fighting multiple mobs in tight spaces, so weapon speed and area coverage both matter more than raw single-target damage.
Shield: Non-negotiable. Bogged shoot poison arrows and breezes knock you around with wind charges; a shield blocks both and buys you time to reposition.
Pickaxe: You'll want to break blocks for shortcuts, dig emergency escape routes, or clear rubble. Bring a decent one, not your starter stone pickaxe.
Food: Bring more than you think you need. Combat inside a chamber eats hunger fast, and there's no guaranteed food source once you're deep inside.
Torches or a light source: Trial Spawners ignore light level entirely when deciding whether to spawn mobs, so torches won't stop encounters. But you still need to see corridors, traps, and loose blocks, especially in the darker corners of a chamber.
Blocks for emergency walls: Cobblestone or any cheap block. Sealing off a corridor mid-fight to buy breathing room has saved more players than any potion.
Water bucket: Useful for negating fall damage if you get knocked off a ledge by a breeze, and for putting out fire if you're dealing with certain ominous encounters.
Recommended Preparation
Enchantments: Protection on armor, Fire Aspect or Sharpness on your weapon, Feather Falling if you're worried about knockback near drops. Mending is a huge quality-of-life addition since you won't want to leave mid-run to repair gear.
Healing supplies: Golden apples or healing potions. Trial fights don't stop to let you eat regen food safely; you need something you can use mid-combat.
Ranged weapon: A bow or crossbow to deal with bogged and stray spawners before they close the distance and start peppering you with poison or slowness arrows.
Backup gear: A spare weapon and a few extra blocks in case something breaks or gets lost.
Ender pearls: Genuinely useful for repositioning during a breeze fight, or for a quick emergency escape if a room goes badly.
How Trial Spawners Work

This is the mechanic that makes the whole structure function, so it's worth understanding properly instead of just reacting to it.
A Trial Spawner activates when you come within 14 blocks of it and it has direct line of sight to you — even through glass or copper grates, interestingly, which is different from how normal hostile mobs check sight lines. Once it triggers, it doesn't need to keep seeing you; it just starts spawning.
Here's the part most guides get vague on: light level does nothing here. A Trial Spawner will happily spawn mobs in a fully lit room. Torches are for your visibility, not crowd control.
Each spawner spawns mobs in waves rather than all at once, checking every second or two whether it's allowed to add another one. It caps how many mobs can be alive from it simultaneously, and it caps the total number it'll ever produce in that trial. Both numbers scale up with more players nearby. Bring three friends, and you're not just splitting loot three ways, you're also fighting noticeably more mobs. A solo player facing a standard spawner in a chamber will typically see roughly six total mobs spawn over the fight, with about three alive at once; breeze spawners are lighter (closer to two total, one at a time), and baby Zombie spawners throw more bodies at you with a lower simultaneous cap.
Once every mob it spawned is dead, the spawner pauses briefly, then starts ejecting rewards, one drop per detected player, roughly every second and a half. About half the time that drop is a Trial Key. The other half, it's food or a potion. After it finishes rewarding everyone, it locks down for 30 minutes before it can be triggered again, even if you leave the area and come back.
This is fundamentally different from a normal dungeon spawner, which just endlessly pumps out mobs as long as conditions allow. A Trial Spawner is a finite, self-contained fight with a guaranteed payout at the end, which is exactly why the "clear one spawner at a time" rule matters so much. Trigger two or three at once and you're not fighting one finite encounter anymore, you're fighting a compounded mess with no clean end point.
Mobs You Can Face in Trial Chambers

Every chamber locks in its mob choices when it generates. Each Trial Spawner is assigned to one of three categories (melee, small melee, or ranged), and the whole structure only uses one mob per category for its entire layout. So if your chamber's melee spawners are set to zombies, every melee spawner in that chamber spawns zombies, not a random mix of zombies and spiders. Breeze spawners are the one exception; they show up in their own dedicated rooms regardless of the category rolls elsewhere.
Zombies, husks, or spiders (melee category): Whichever one your chamber rolled, expect it to close distance fast and hit hard in groups. The main danger is getting surrounded in a tight room. Fight with your back to a wall or a doorway so you're only exposed on one side.
Silverfish, baby zombies, cave spiders, or slimes (small melee): Individually weak, but they spawn in higher numbers and move fast. Cave spiders in particular can slip through gaps you wouldn't expect. Don't underestimate this category just because the mobs are small. Getting swarmed by six of them at once still hurts.
Strays, Skeletons, or Bogged (ranged): This is the category that punishes players who rush in without a shield. Bogged shoot poison-tipped arrows and are exclusive to swamps and Trial Chambers, so this might be your first real encounter with them. Strays inflict Slowness. Skeletons are the baseline threat but still dangerous in numbers. Close the gap fast or use cover; standing still in the open against a ranged spawner is how you lose most of your health bar.
Breeze: The signature Trial Chambers mob, and the one that catches the most players off guard. Breezes bounce around the room and fire wind charges that knock you back hard, sometimes off ledges or into other hazards. They're immune to projectiles, so bows don't work against them. You need to close in and fight melee, timing your approach around their jump pattern. Killing one drops a breeze rod, which you'll want for Crafting a wind charge, brewing a potion of wind charging, or eventually building the Mace.
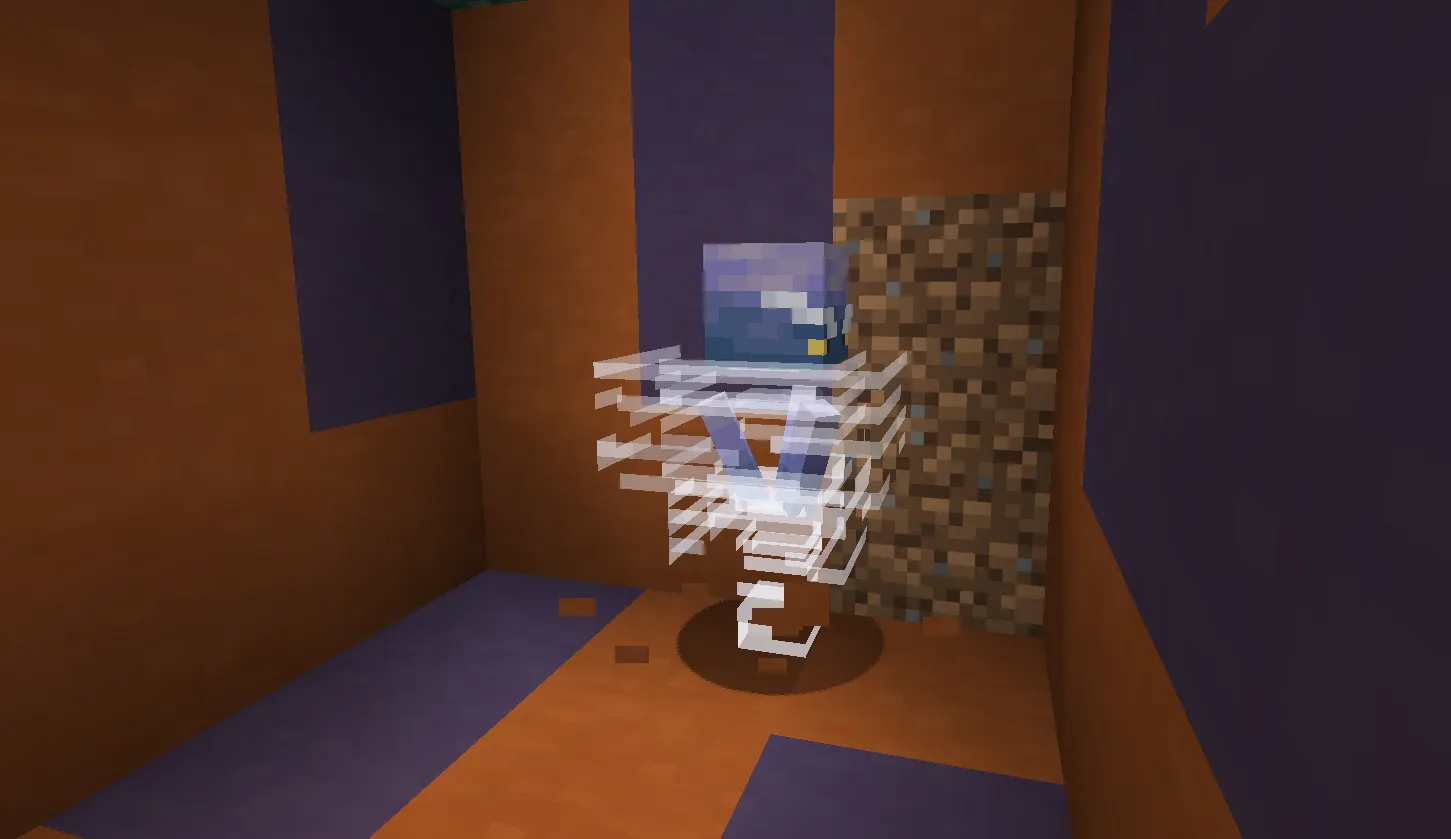
Common beginner mistakes: fighting a ranged spawner in open ground instead of using corners for cover, standing near ledges while a breeze is active, and assuming small-melee mobs aren't a threat until you're already surrounded.
How to Survive Trial Chamber Combat
The core rule is simple and it's the one thing most new players ignore: never trigger more than one spawner at a time. Trial fights are meant to be finite and manageable in isolation. Chain two or three together and you'll be fighting on multiple fronts with no clear end in sight.
Control your angles. Fight in doorways or corridors where mobs have to approach you one or two at a time instead of surrounding you in an open room.
Deal with ranged threats first. If a fight has both melee and ranged mobs alive at once, prioritize closing the distance on archers and bogged before they whittle you down from a spot you can't easily reach.
Respect the breeze's knockback. Don't fight near ledges, lava, or drops. A wind charge to the chest near an open pit is how a lot of otherwise-successful runs end badly. If you get launched, use your water bucket or just accept the fall and heal after.
Watch for poison and slowness. Bogged and strays don't just deal damage, they inflict debuffs that make everything else worse. Keep milk buckets or a way to cure poison on hand if you're planning to fight bogged spawners.
Know when to wall off and retreat. If a room goes worse than expected, sealing a corridor with placed blocks and repositioning isn't cowardice, it's how experienced players avoid losing their gear. There's no penalty for pulling back and re-engaging once you've healed.
Solo vs. group changes your math. Solo, you fight fewer total mobs per spawner but have to handle every angle yourself. In a group, more mobs spawn overall, but you can split attention and cover each other's blind spots. Neither is strictly easier; groups just trade raw mob count for the ability to specialize.
Trial Keys Explained
A Trial Key is what a Trial Spawner drops instead of food or a potion, roughly half the time, on average. You get one for defeating that spawner's mobs, and it's yours to keep and use whenever you want; it doesn't expire or get consumed by anything except opening a vault.
The progression is straightforward: clear a Trial Spawner's mobs → it ejects a reward → about half the time that reward is a key → use the key on a nearby vault. Since each chamber usually has multiple spawners and multiple vaults, don't burn your first key on the first vault you see if you're planning a longer run. Scout a bit first so you're not backtracking.
In multiplayer, every player who was detected by the spawner gets their own independent reward roll, so keys aren't shared or split. That means a group run isn't about dividing up loot; each person walks away with their own set of keys and their own vault pulls.
Vaults: How They Work and What They Contain
A vault is a locked container that generates throughout the chamber, easy to spot thanks to its gold-trimmed, glowing appearance. Walk up to one with a Trial Key in hand and it unlocks automatically, ejecting an item from its loot table.
The key detail that trips people up: vaults reward once per player, not once total. If you're running with friends, everyone who has a key can open the same vault and get their own separate loot roll. Nobody's locked out because someone else opened it first. Vaults can't be mined or picked up; they're a fixed structure feature, so there's no way to "collect" one and take it home.
What you'll actually find in a normal vault includes things like enchanted books, gear pieces, emeralds, and a chance at cosmetic extras like the Guster banner pattern or the "Precipice" music disc. None of it is guaranteed on any single open; vault loot is randomized from a weighted table, so some items show up far more often than others. Treat any single vault as a gamble, not a guaranteed haul, and treat multiple vault openings as your actual strategy for getting something specific.
Ominous Trials Explained
An Ominous Trial is the harder, higher-stakes version of a normal Trial Spawner encounter, and it only happens if you're carrying the right effect when you approach one.
Here's the chain: if you have Bad Omen active and you walk into a Trial Spawner's range, you get the Trial Omen effect, and any nearby Trial Spawners convert into Ominous Trial Spawners. This works even on a spawner that's currently on cooldown, since going ominous skips the wait entirely, though it also means any mobs it had already spawned despawn and the fight restarts from scratch.
Ominous Trial Spawners spawn mobs that come equipped with gear, and they can shoot potions and projectiles at you on top of the mob's normal attacks. It's a noticeably tougher fight than the base version, and it should be treated that way. This isn't the mode to attempt with basic diamond gear and no healing plan. If you're not confident clearing a normal spawner cleanly, an ominous one will punish that gap fast.
Ominous Trial Keys and Ominous Vaults
The ominous progression mirrors the normal one but with better rewards at every step:
-
Get Bad Omen (from an ominous bottle, which you either loot from a normal vault or get as a drop from a raid captain)
-
Approach an active Trial Spawner while Bad Omen is active. This triggers Trial Omen and starts the Ominous Trial
-
Defeat the tougher, equipped mobs the ominous spawner throws at you
-
Collect an Ominous Trial Key from the spawner's reward
-
Find an Ominous Vault (visually distinct from a normal vault) elsewhere in the chamber
-
Unlock it with your ominous key
-
Collect the reward, pulled from a completely different, higher-value loot table
This is the only reliable path to the Heavy Core, which you need to craft the Mace alongside a breeze rod. Ominous vaults also carry a much higher chance at the Flow armor trim and Flow banner pattern compared to their normal-vault counterparts, plus a shot at the "Creator" music disc. Given how central the Heavy Core is to actually getting a Mace, ominous vaults are the real long-term goal for players who've already cleared a few normal chambers and want something worth the extra risk.
Best Loot in Trial Chambers Ranked
Top-Tier Rewards
Heavy Core: Ominous vault exclusive, and the only ingredient (besides a breeze rod) you need for the Mace. This is the single biggest reason to push into ominous trials.
Mace-related enchantments (Density, Breach, Wind Burst): These are exclusive to the mace and dramatically change how it performs. Worth grabbing on enchanted books whenever they show up.
Flow armor trim: Ominous vault loot, notably rarer to find outside this structure. A strong cosmetic and prestige item for players who care about full trim collections.
Valuable Rewards
Enchanted books: Useful regardless of whether they're mace-specific; a good source of enchantments you might not have an easy alternate route to.
Bolt armor trim, Guster banner pattern: Normal vault rewards, decent rarity, good for collectors and builders.
Music discs ("Precipice," "Creator"): Not gameplay-impactful, but genuinely nice pulls if you care about jukebox variety, and the "Creator" disc specifically is ominous-vault-only.
Common Utility Loot
Wind charges, emeralds, food, and basic potions: Not exciting, but useful filler that keeps a run productive even when you don't land a big roll. Breeze rods from kills also fall in this bracket since they're needed for multiple crafting recipes beyond just the mace.
Don't chase exact drop percentages as a script. Loot is randomized, and treating any single number as a guarantee will just lead to frustration. Multiple vault runs, not math, is how you actually get what you want.
Best Strategy for Clearing a Trial Chamber
-
Gear up fully before entering. Don't plan to "figure it out" mid-run.
-
Mark or remember your entrance point, since chambers are large and disorienting.
-
Move slowly and check corridors before committing to a room.
-
Approach one Trial Spawner at a time, never triggering a second while the first is still active.
-
Keep an escape route in mind for every fight, especially near ledges or lava.
-
Clear the spawner completely before collecting its reward.
-
Bank your Trial Keys as you go instead of rushing to the nearest vault.
-
Locate vaults methodically rather than backtracking repeatedly.
-
Open vaults once you've got a decent stock of keys, so you're not making single trips back and forth.
-
Decide whether to pursue an Ominous Trial only after you're confident with normal encounters.
-
Leave with your loot rather than pushing for "one more spawner" once you're low on food or healing supplies.
Experienced players often bring a spare set of blocks specifically for sealing off cleared corridors, which keeps mobs from wandering back into rooms you've already secured and turns the chamber into a progressively safer space as you go.
Solo vs Multiplayer Trial Chambers
Solo runs mean fewer total mobs per spawner, but you're handling every threat angle yourself with no backup if something goes wrong. It's more methodical and slower, but also more controllable. You're never waiting on a teammate to notice a bogged sneaking up behind them.
Multiplayer runs scale mob counts up per spawner, so the raw difficulty per fight goes up too. What you gain is coverage: one player can watch the ranged mobs while another handles melee, and reviving or protecting a downed teammate is possible in a way solo play simply doesn't allow. Communication matters here more than gear does. A group that doesn't call out threats will struggle more than a well-organized duo with worse equipment.
The vault math also favors groups in a practical sense, since each player gets an independent loot roll from every vault they personally unlock. A four-player group walking away from a chamber usually collects noticeably more total loot than a solo run through the same structure, even accounting for the harder fights.
Common Trial Chamber Mistakes
-
Entering with sub-diamond gear. Trial Chambers are built around a specific power level; showing up undergeared just means a wasted trip or a death.
-
Triggering multiple spawners at once. The single most common cause of unnecessary deaths in this structure.
-
Ignoring ranged mobs in favor of whatever's closest. Bogged and skeletons left alive at range will keep chipping your health while you focus elsewhere.
-
Standing near ledges during a breeze fight. Wind charge knockback plus an open pit is a bad combination.
-
Opening keys and vaults carelessly without scouting the chamber first. You might miss vaults entirely if you rush.
-
Attempting an Ominous Trial before you've comfortably cleared normal ones. The jump in difficulty is real, not cosmetic.
-
Not marking your way back to the entrance. Chambers are large and mazy enough that getting turned around costs real time.
-
Staying too long after running out of healing. Once your golden apples or potions are gone, that's your signal to leave, not push further.
Are Trial Chambers Worth Exploring in Minecraft's Current Version?
Yes, especially if you're past the early game and looking for a structured combat challenge with real payoff. The loot quality is genuinely strong. The Mace alone is worth the trip for most players, and enchanted books plus armor trims add long-term value beyond a single run.
Early game, they're rough. You need solid gear just to survive a normal chamber, so don't treat this as a first stop after spawning in a new world. Mid-game is the sweet spot: you've got diamond gear, maybe some enchantments, and you're looking for a next step before the Nether or the End. Late-game players will mostly return for Ominous Trials specifically, chasing Heavy Cores and rare trims rather than basic loot they've already got plenty of.
Replayability is decent since chamber layouts and mob combinations are randomized every time, though the core loop (clear spawner, collect key, open vault) stays the same no matter which chamber you're in. If you've done a few runs and gotten your Mace, later visits are mostly about ominous loot rather than fresh discovery.